BuzzStream is a powerful tool for doing influencer outreach. In this guide to using Buzzstream, I show you how to set up an expert roundup campaign in 7 easy steps.
Expert roundups are a fantastic technique for building relationships with experts in your niche, getting high-quality backlinks to your website, and building out the authority of your website.
But expert roundups involve sending a lot of emails to different people. Keeping track of all those emails can quickly become a headache if you don’t have fit-for-purpose software.
And that’s where BuzzStream comes in.
I’ll be honest with you.
There are aspects of putting together an expert roundup that are just plain tedious.
Copying and pasting names and email addresses, keeping track in an Excel spreadsheet of who you’ve contacted, who replied, and who you’ve thanked.
I found the process so time consuming and repetitive that after my third expert roundup, I was beginning to wonder whether it might be my last.
But then I did decided to try out some Influencer outreach software.
And that changed everything!
The software I’d heard most about was BuzzStream. So I signed up for a 14-day free trial and started to put together an Expert Roundup.
I soon found myself riding the learning curve that comes with any new software.
But hopefully, the process will be a bit quicker and smoother for you – this guide shows you step-by-step how to do it.
A Quick Guide To Using BuzzStream for Expert Roundups
#1. Create a Project
Once you’ve signed up click on the arrow in the ‘Projects Tab’:

Then click on ‘New Project’:

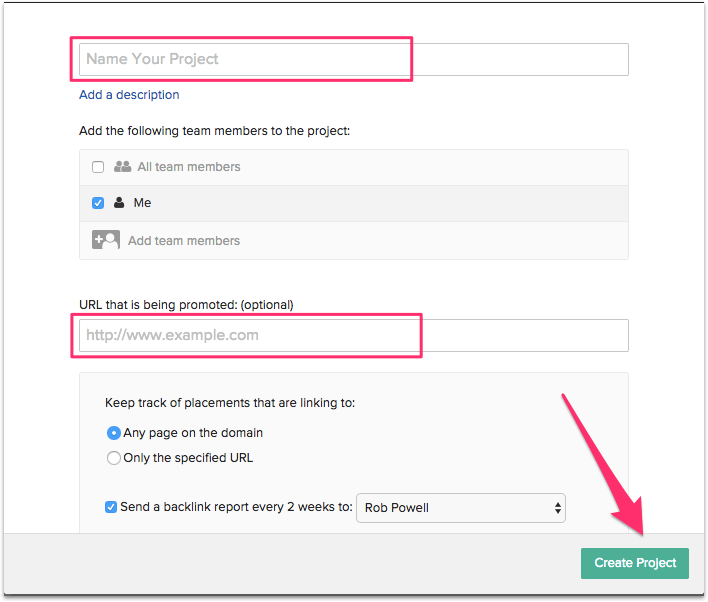
On the next screen, give your Project a name and enter the URL of your website. Leave everything else as is and click on ‘Create Project’:
#2. Install the BuzzStream BuzzMarker
This tool is one of the things I love about using BuzzStream!
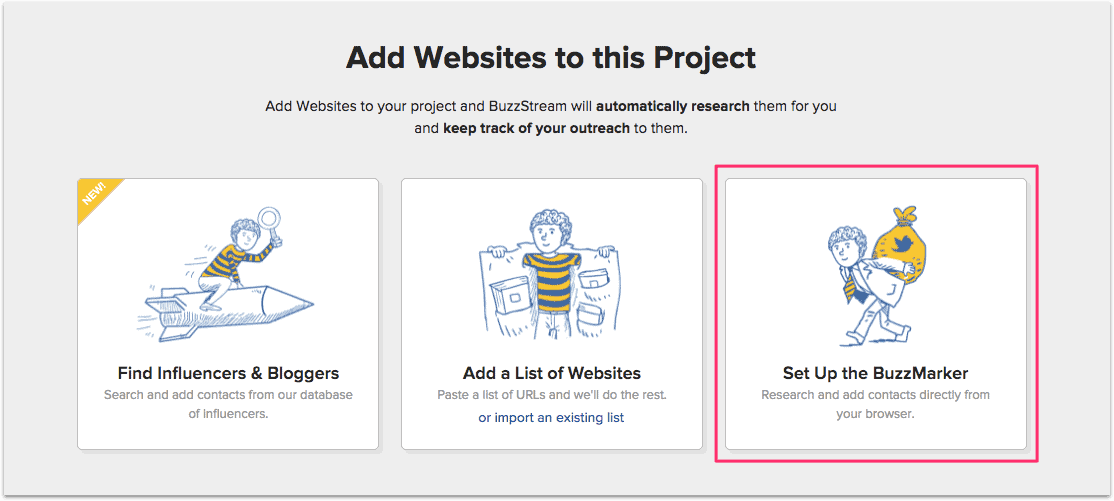
On the next screen click on ‘Set Up the BuzzMarker’:
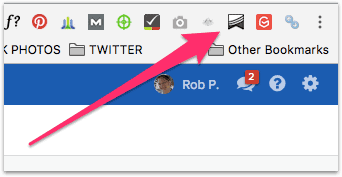
Once you have the BuzzMarker installed, a small ‘bookmark’ shaped icon will appear at the top right of your browser (if using Chrome):
#3. Find Influencers
BuzzStream has a very powerful feature called the ‘BuzzStream Prospecting Tool’ but I’m not going to use it.
Why?
Because I have another technique for finding contributors for roundup posts.
Here’s the deal:
The quickest and easiest way of finding influencers and experts for your roundup posts is not to start from scratch but to use the research that others have already done.
What do I mean by that?
Go to Google and look for existing roundup posts. You’ll find dozens of them on any number of different topics. Use these existing roundups to build your list of potential contributors.
This technique has two key advantages that will save you time. The people you find using this technique are already qualified as:
- experts in their field, and
- willing to participate in roundups
Are you ready?
Let’s dive in:
First, you’ll need to sign up for a free Evernote account and install the Evernote Web Clipper.
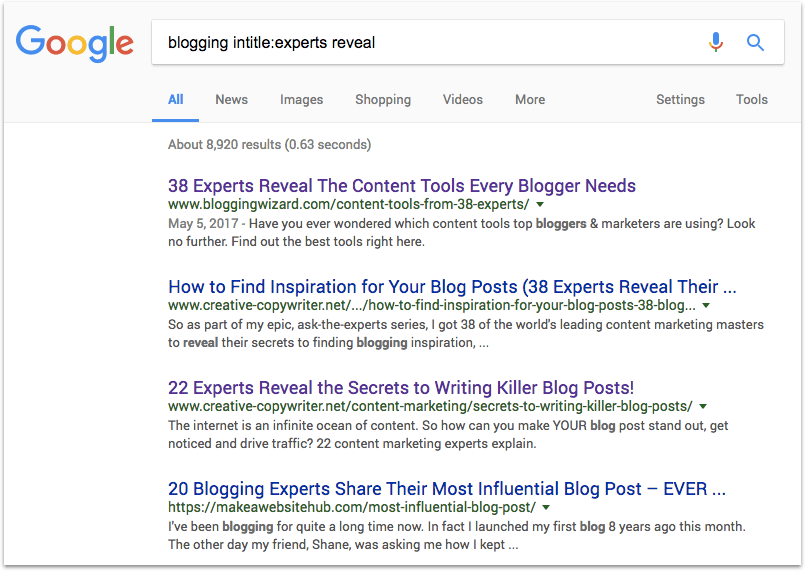
To find these expert roundups, go to Google and type in a search string along these lines:
- keyword intitle:experts reveal
- keyword intitle:influencers reveal
- keyword intitle:top tips
Click on each of the roundup posts that you find:
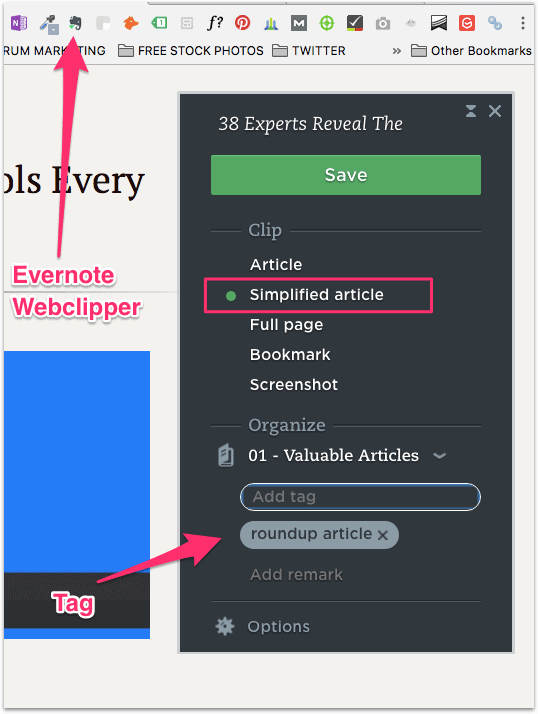
Using the Evernote Web Clipper, save each roundup post to an Evernote Notebook, as a ‘Simplified article’, with a tag such as ‘roundup article’:
Repeat this process until you have at least 15 roundup articles saved to Evernote:
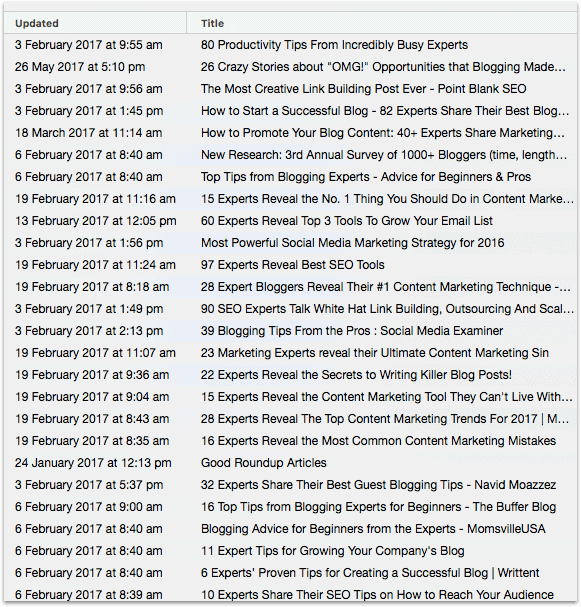
The roundup articles you save to Evernote need to be broadly related to the subject of your roundup post.
If you’re compiling a roundup post on ‘content marketing’, it won’t be helpful to save roundups dealing with ‘home finance’. Because you’ll be contacting these experts and asking them to contribute to your roundup.
#4. Add Influencers to BuzzStream
Stay with me – this step is important:
Now go back to Evernote and double click on the first of your saved roundup posts.
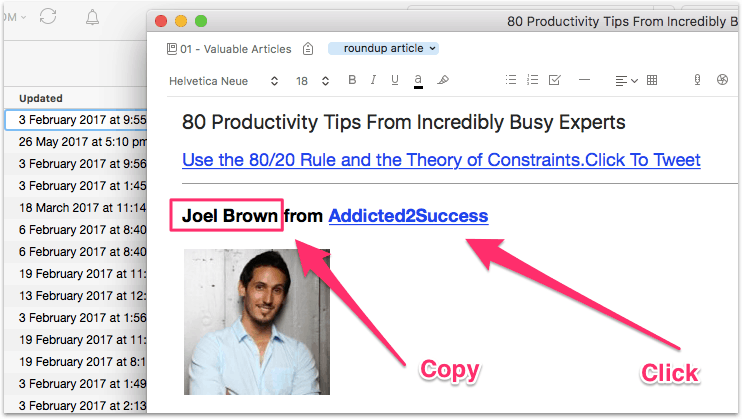
In that roundup post, find the first expert’s name and website. Copy the expert’s name and click on the website link:
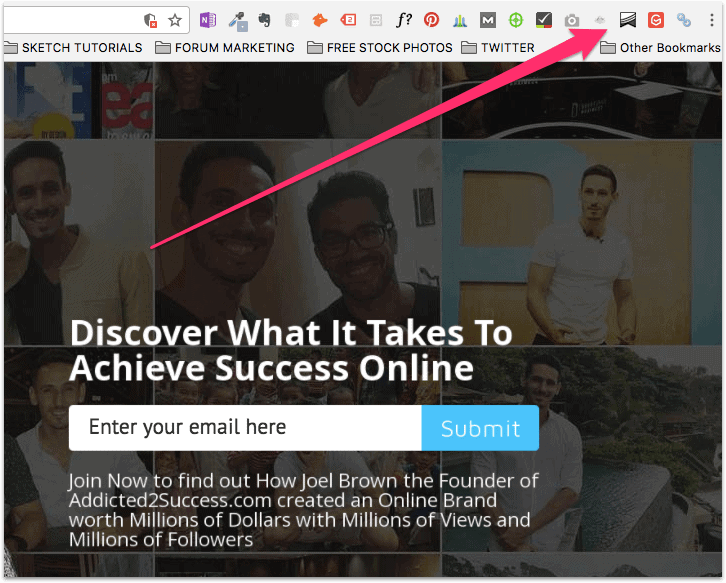
On the expert’s web page, click on the BuzzMarker icon at the top right of the browser window:
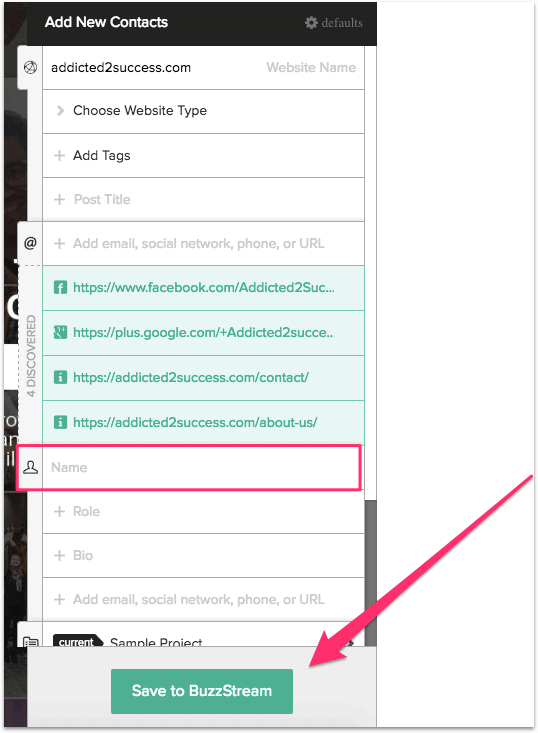
When the BuzzMarker side panel opens up, paste the expert’s name into the ‘Name’ field and then hit ‘Save to BuzzStream’:
#5. Find Email Addresses
This is another thing I love about using BuzzStream:
Once you’ve saved 10 to 20 websites in your BuzzStream Project, go back to your BuzzStream account, click ‘Websites’ in the top menu, and click on the first column in the first record:
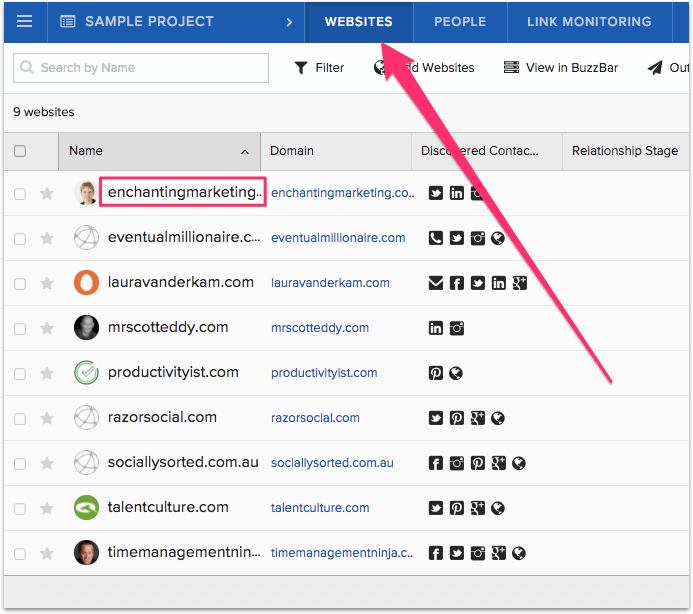
BuzzStream will now open up the individual record for that website.
If the expert’s email address doesn’t appear under ‘Contact Info’, click on the green ‘Discovered Contact Info’ box.
In this instance, BuzzStream has discovered 7 items of contact info:
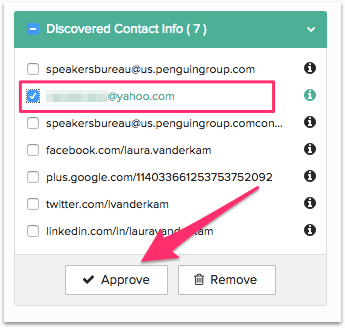
One of them is the email address we’re looking for. Check the box next to the email address and click approve.
What To Do When BuzzStream Can’t Find An Email Address
BuzzStream won’t always find an email address for you. When that happens, you need to get some outside help. Here are two services that find email addresses for you:
They’re both great email finders and of the two, Voila Norbert has probably been around the longest. But the one I’m familiar with is Hunter, so in this tutorial, I’ll be using Hunter to show you how to uncover email addresses.
Go to www.hunter.io and sign up for a free account. The free account gives you 150 free searches – enough to complete a few roundup posts.
Once you’ve signed up, install the Hunter Chrome Extension. A strange Dr Suess-like figure will appear in your browser menu bar:

Go to the expert’s website and simply click on the Hunter Extension icon and a dialog box will open up:
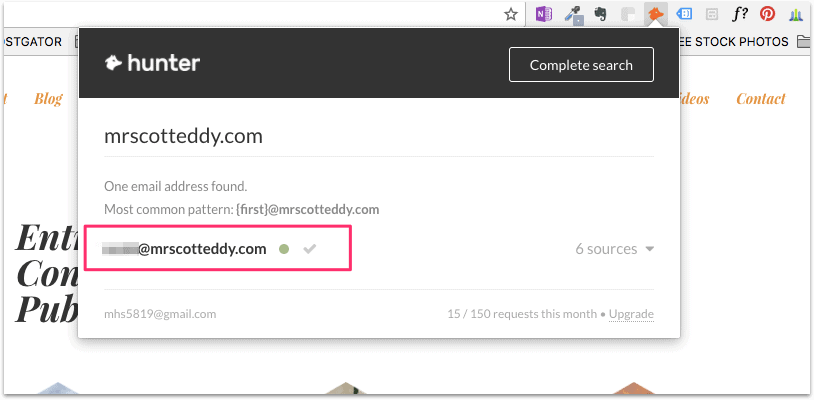
As you can see, Hunter has found an email address for this expert.
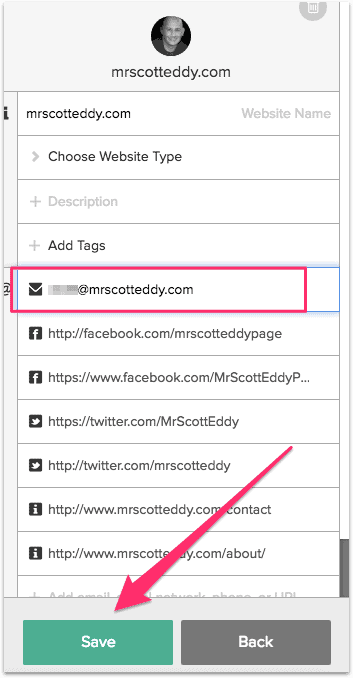
Copy it, click on the BuzzStream extension icon, then paste the email address into the relevant field, and click ‘Save’:
In some cases even Hunter won’t find an email address.
When that happens, just go to the expert’s website and sign up their newsletter.
Most online entrepreneurs use a personal email address as the ‘from’ address for their mailing list.
As soon as you get the confirmation email, just copy and paste the ‘from’ address into the relevant field in BuzzStream.
Sometimes the expert doesn’t have a newsletter. At that point I usually decide that the ‘game is not worth the candle’ and move on to the next record in the BuzzStream list.
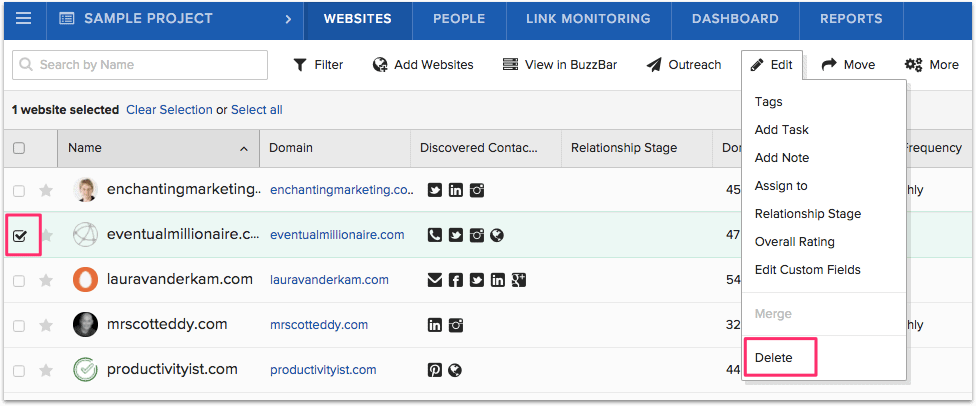
When you come across a website that you can’t find an email address for, check the box next to that record, then go to ‘Edit’ and then ‘Delete’:
#6. Create an Outreach Template
Are you still with me?
Great!
This next step is easy:
To create a template for your email message, click on ‘Outreach’ in the top menu:

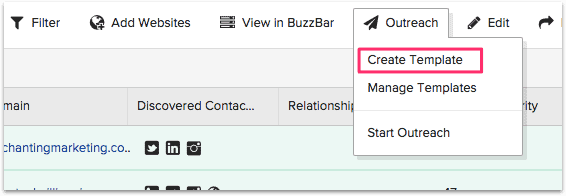
And select ‘Create Template’:
In the next screen type in your message and a subject line. On the right side of the window you’ll see a bunch of ‘merge fields’:
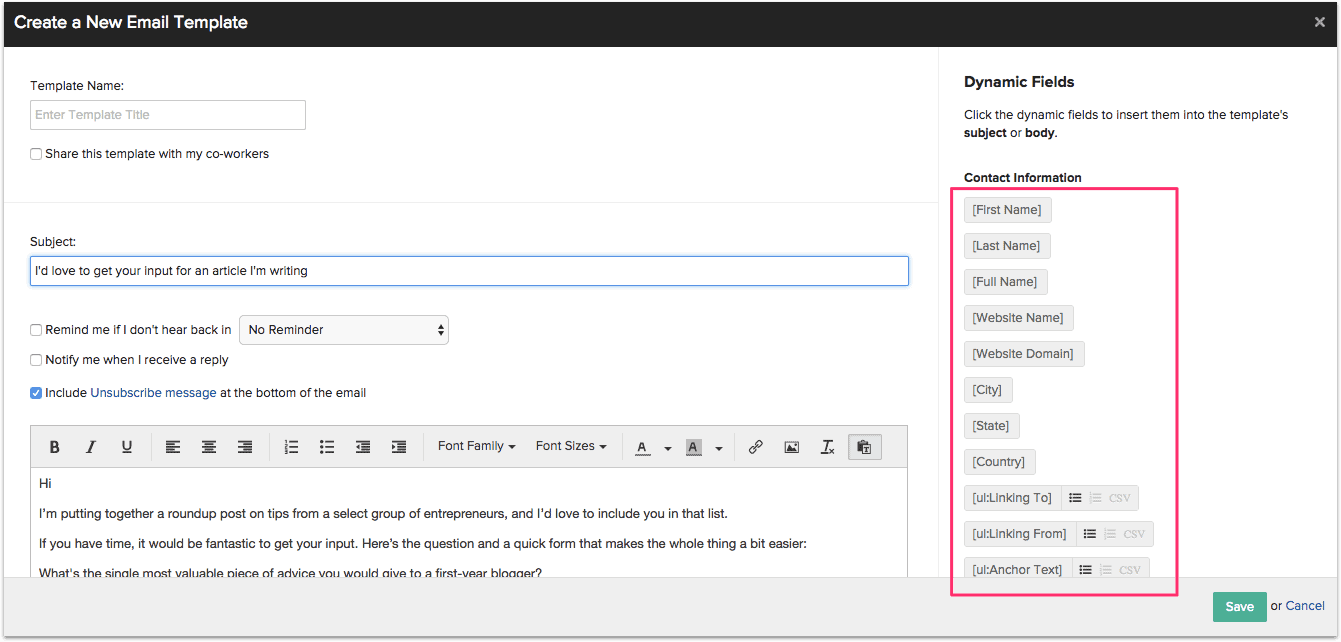
Place your cursor at the beginning of the subject line and then click the [First Name] merge field. This will insert the merge field into your subject line.
Then place your cursor after the salutation and click the [First Name] merge field again. This will insert the merge field into your salutation:
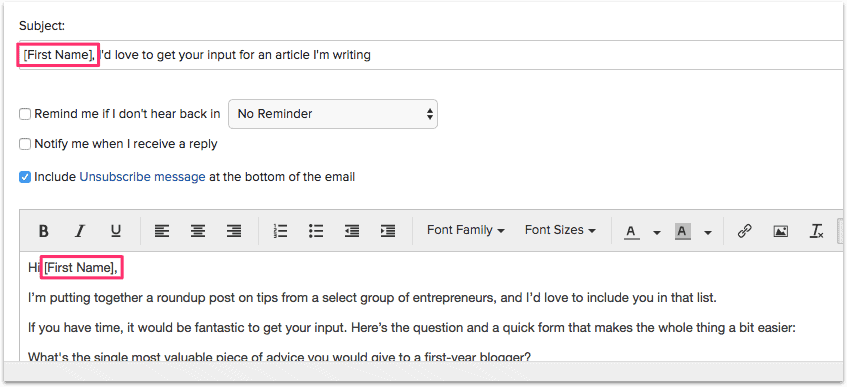
Then click ‘Save’ in the bottom right corner of the template window.
#7. Begin Your Outreach
Phew!
That was a lot of detail…
…but keep reading because we’re nearly done:
Before you can start your BuzzStream Outreach you need to have at least one checkbox ticked at the far left of the screen:
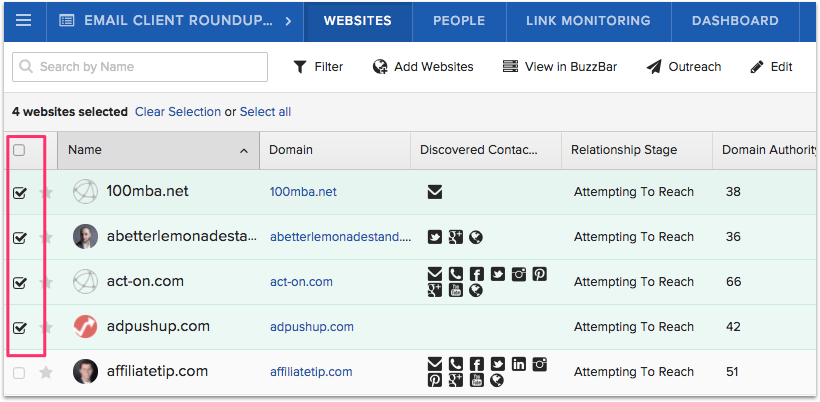
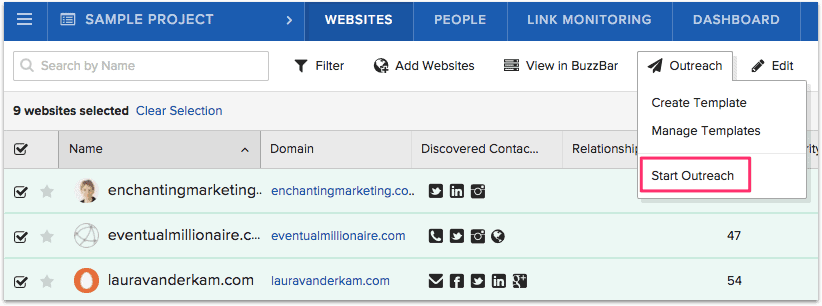
Next, click on ‘Outreach’ in the top menu and then ‘Start Outreach’:
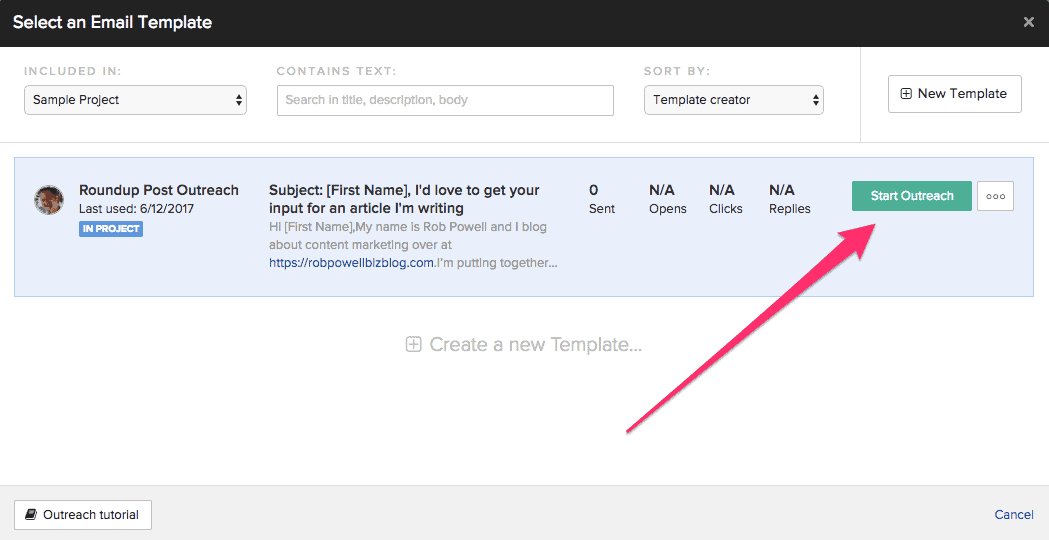
In the next window, select the template you want to use and then click ‘Start Outreach’:
Using Filters
This is where BuzzStream excels:
Once you’ve done your first outreach you’ll probably want to keep going and send another batch of outreach emails.
It usually takes me 5 or 6 batches of outreach emails before I have enough contributors for my roundup post.
If you’re like me, at this point you’ll start thinking that you need to start a new Project so as not to mix up the people you’ve already outreached to with the next batch of outreach emails.
But you’d be wrong (as I was)…
BuzzStream has very advanced filtering that allows you to easily separate websites you’ve already reached out to from those you haven’t.
So how do you ensure that you only send outreach emails to people you haven’t yet contacted?
Easy:
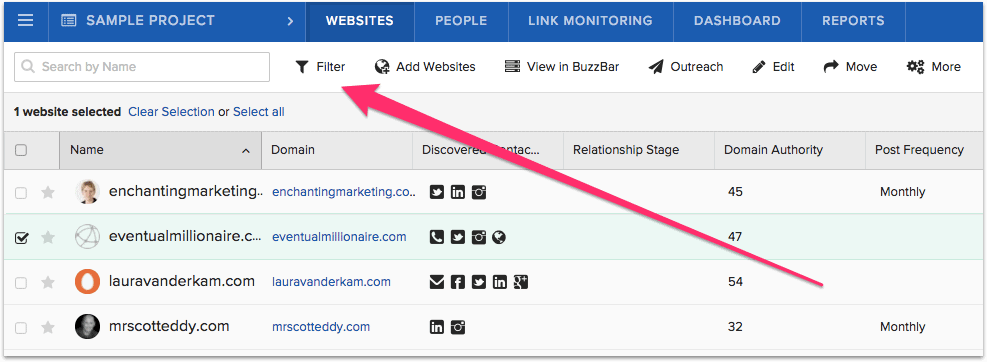
Click on ‘Filter’ in the top menu:
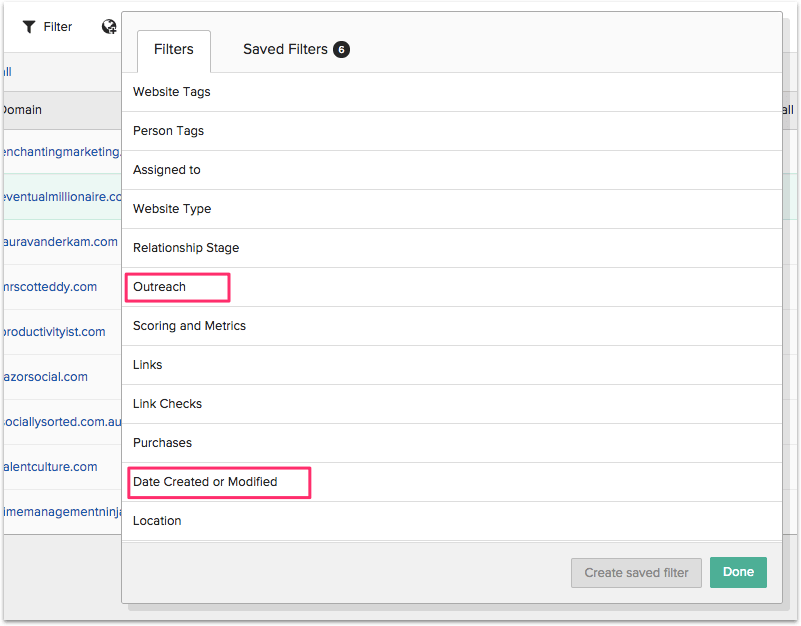
You need to create 2 filters: one in the ‘Outreach’ filter and one in the ‘Date Created or Modified’ filter:
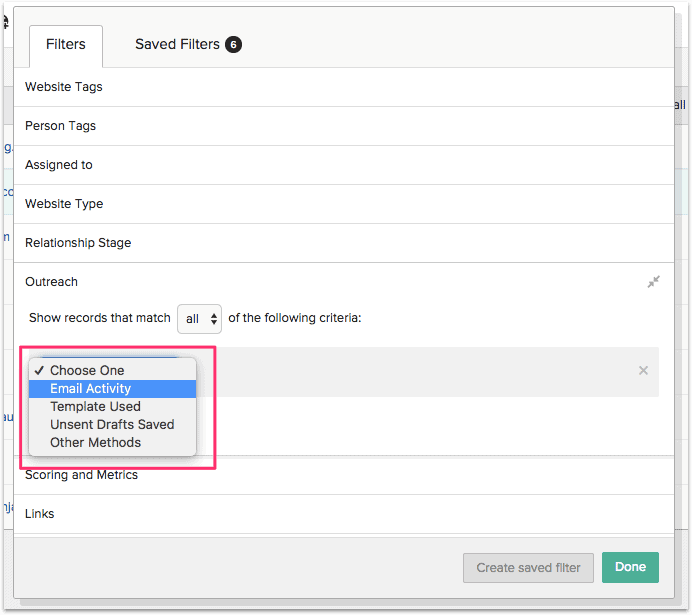
Click on the ‘Outreach’ filter and choose ‘Email Activity’:
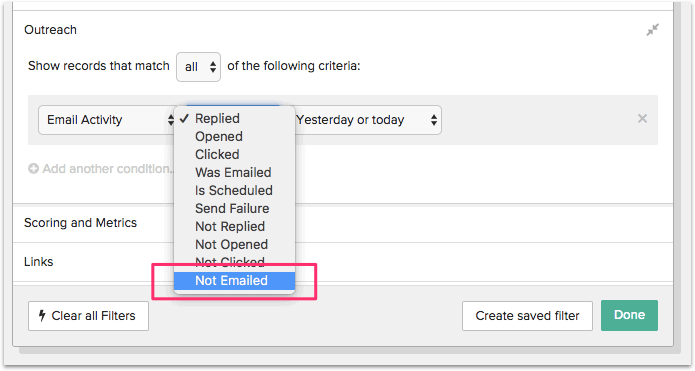
Then choose ‘Not Emailed’ from the drop down list:
On the next drop down list, choose ‘Today’:
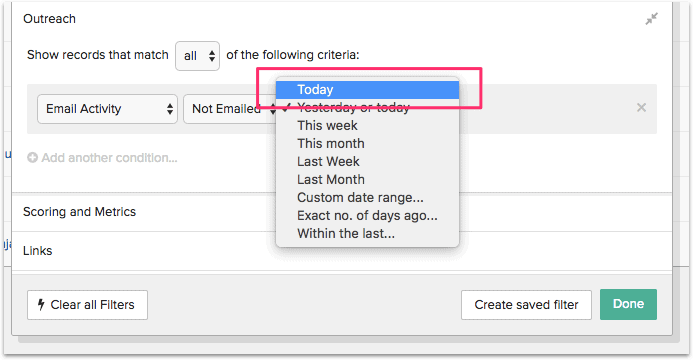
The ‘Outreach’ filter will now look like this:

Now click on the ‘Date Created or Modified’ filter:
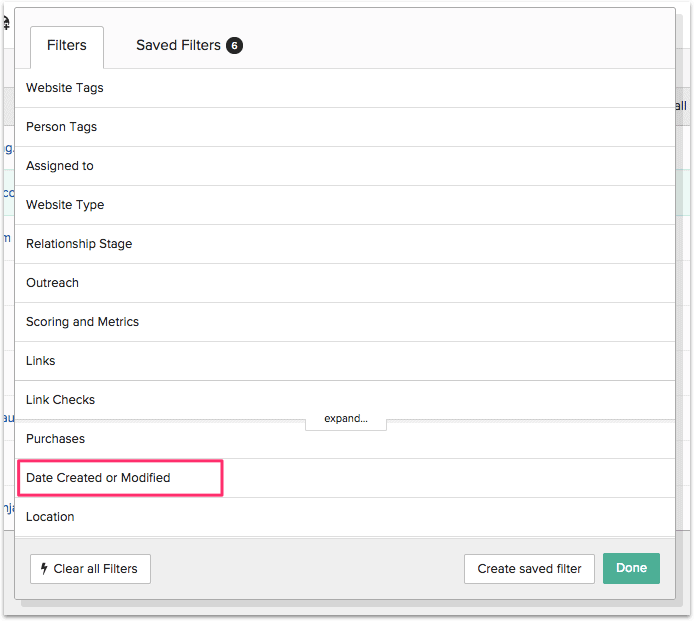
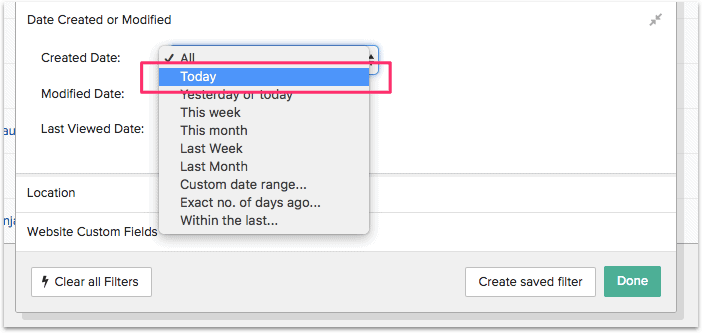
Set this filter to ‘Today’:
Then click ‘Create Saved Filter’ and then click ‘Done’:

Give the filter a name and then press ‘Save’:

In the top menu click on ‘Filter’ and then ‘Saved Filters’:

You’ll see the filter you just saved:
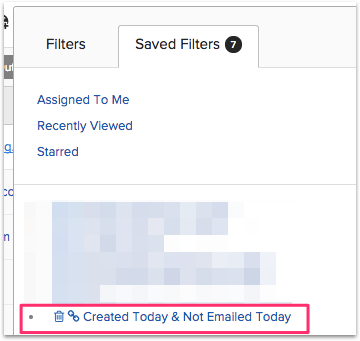
Now click on that filter and then click ‘Done’:
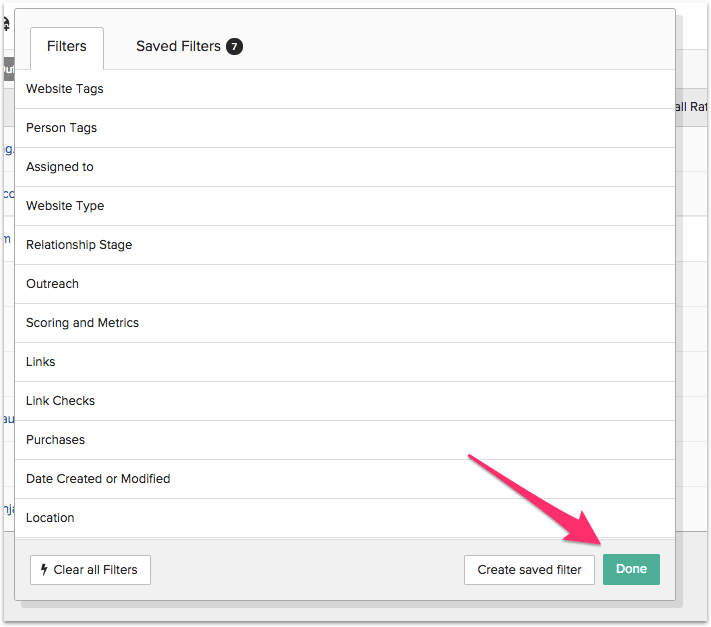
On the next screen you’ll see that your 2 filters have been applied to the current Project:

Now click the checkbox at the top to select all the displayed records:
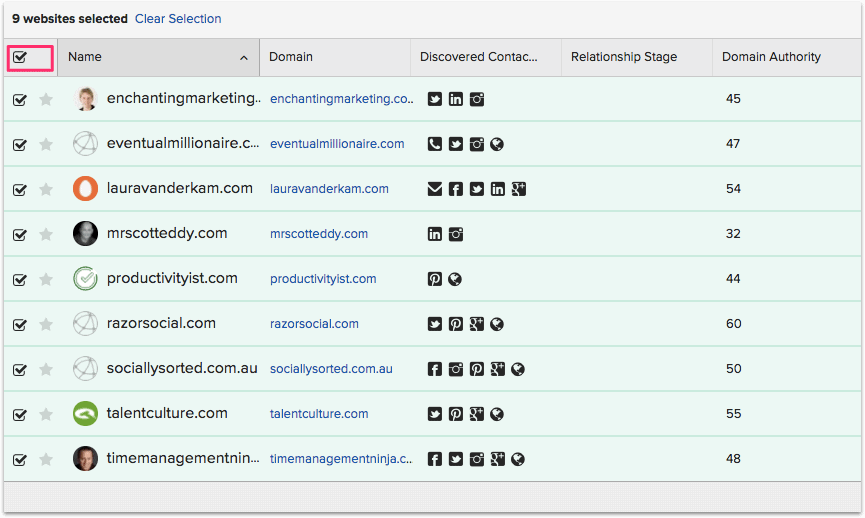
And that’s it:
You’re ready to outreach to your second batch of prospects.
Creating a Custom Field
This is important:
When a contact replies to an email sent from BuzzStream, the system automatically records it. That would be fine if the only action you’re tracking is a response to your email.
But what if there’s another action you want to track?
For example, in my case I’m asking the experts to fill out an online form. I need to be able to filter out people who submitted the form from people who didn’t.
To do this you need to set up a ‘Custom Field’.
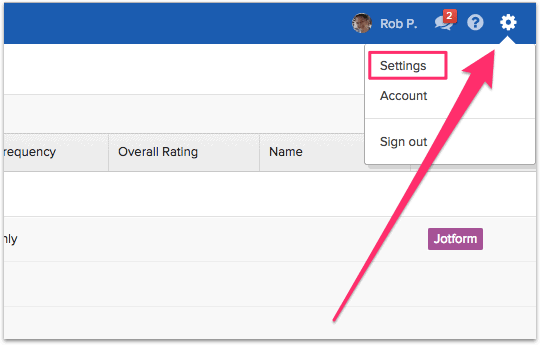
Click on the cogwheel in the top right corner of the screen and then click ‘Settings’:
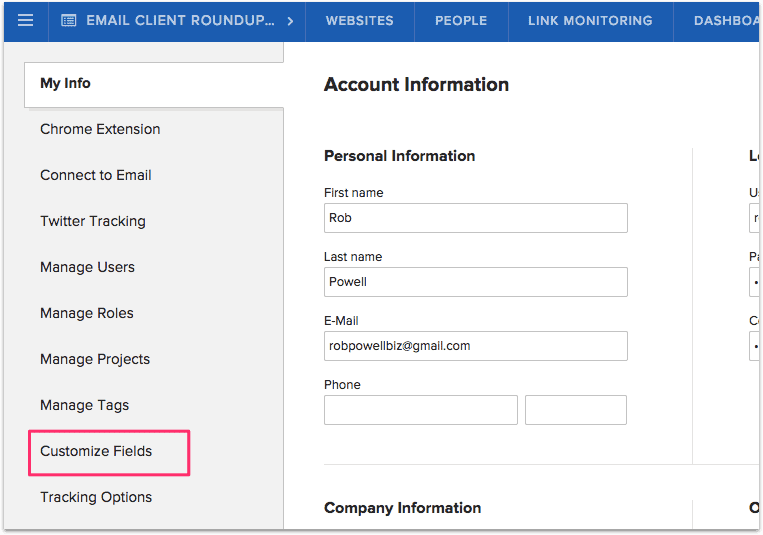
On the next screen click on ‘Customize fields’:
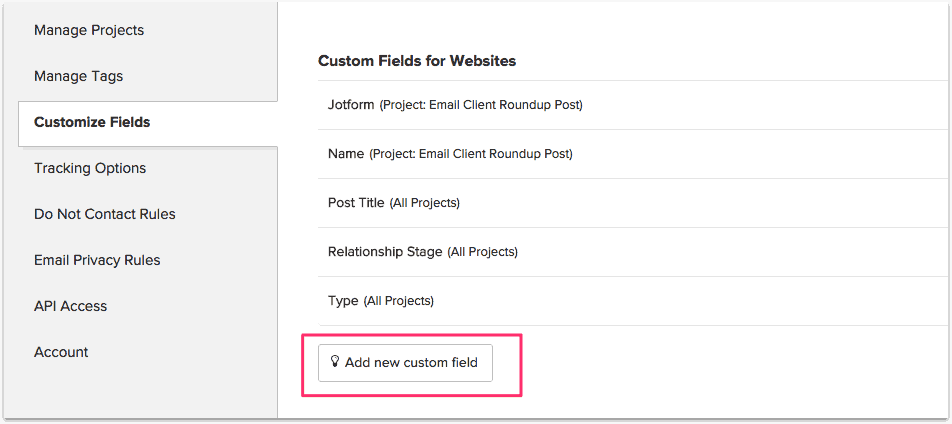
Under ‘Custom Fields for Websites’ click ‘Add new custom field’:
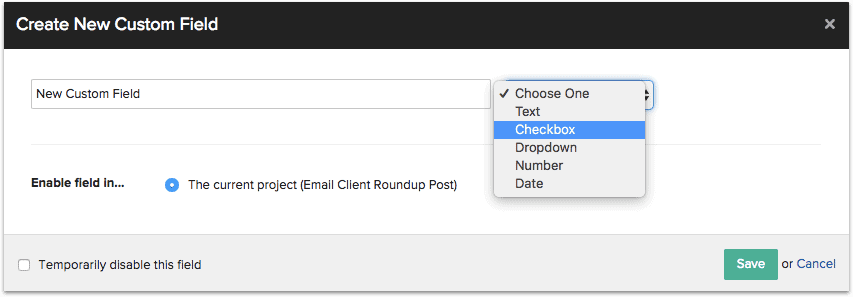
Give the custom field a name, then select the Checkbox option and click ‘Save’:
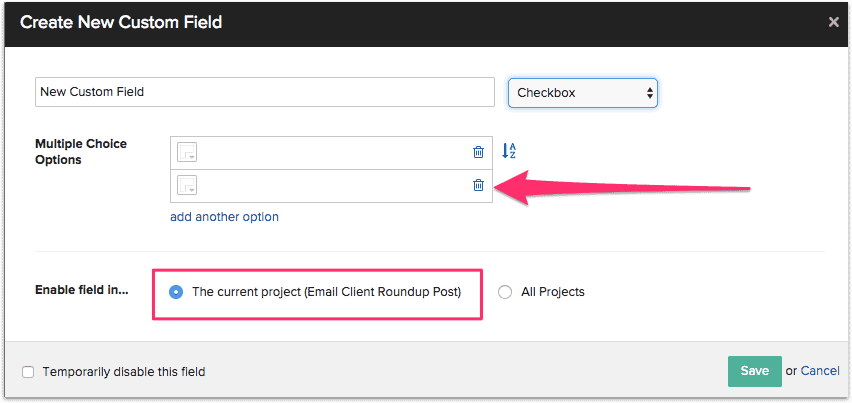
On the next screen delete the second field by clicking the trashcan and check the radio button for the current project:
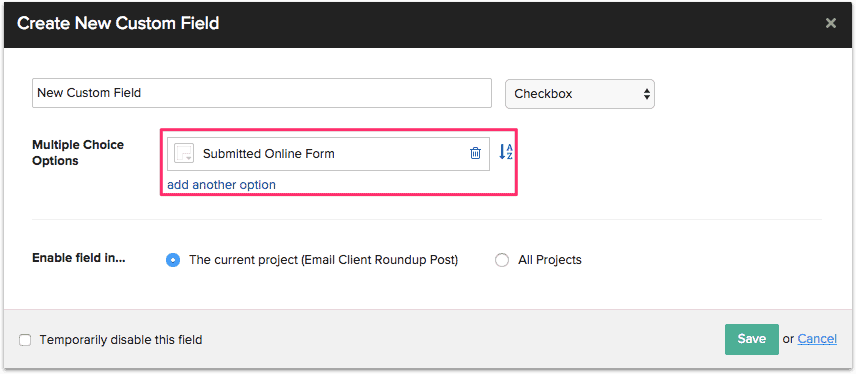
Then give the option field a name:
Next click on the icon within the option field and choose a color for your icon and hit ‘Save’:
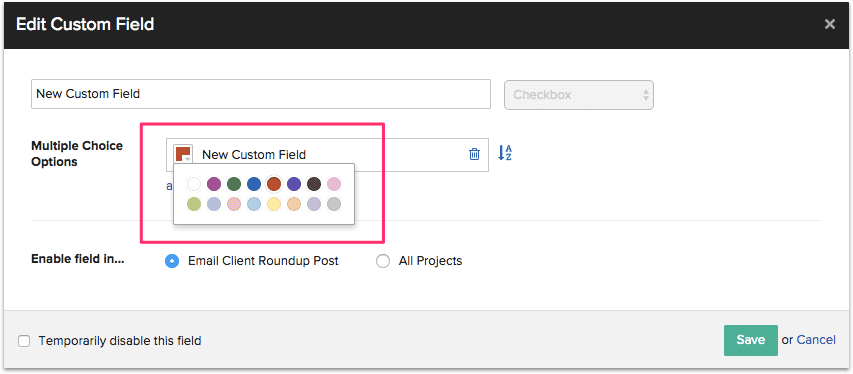
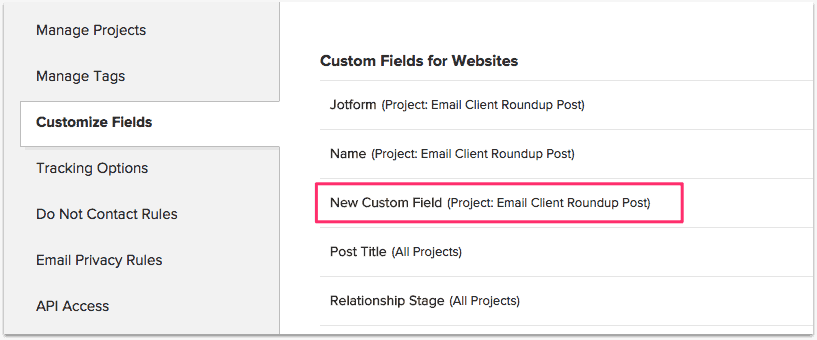
You’ll now see your new Custom Field listed under ‘Custom Fields for Websites’:
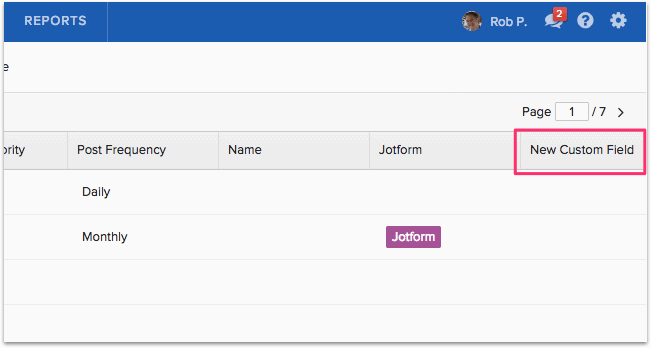
By default, your new custom field will show up as a new column in the ‘Websites’ view. Click on ‘Websites’ in the top menu and your new custom field will be at the far right of the screen:
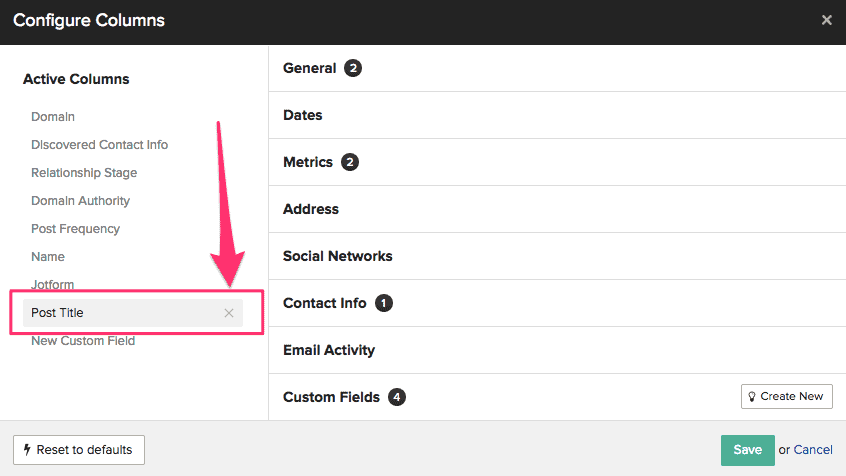
If you can’t see a column with your new custom field, it means you need to delete some unnecessary columns. Just click on the cogwheel at the top right of the screen and choose ‘Configure columns’:
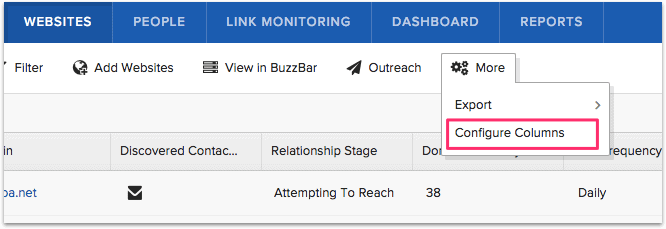
Then delete any unwanted column, by clicking on the ‘x’ in the column field, until there are no more than 9 columns showing:
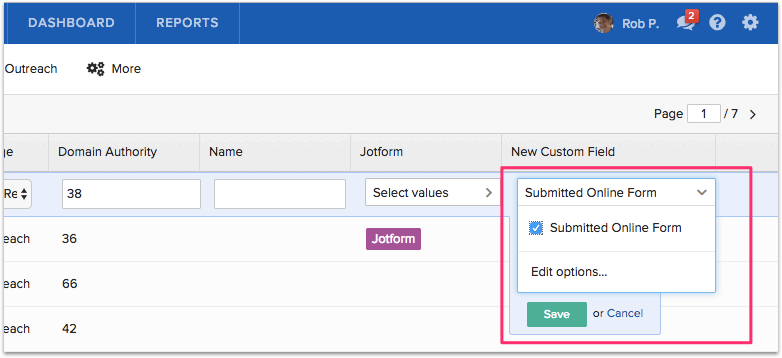
When one of your prospects submits your online form, just click on the relevant column for that person and check the box:
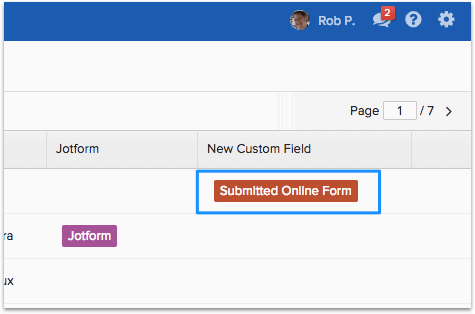
A coloured tag will appear in the relevant column for that record:
When it comes time to send out a thank you email with the link for the live article, you’ll need to apply a filter to your Project so that you only email people who submitted your form.
Here’s how to do it:
Click on the Filter tab in the top menu and scroll down till you see ‘Website Custom Fields’:
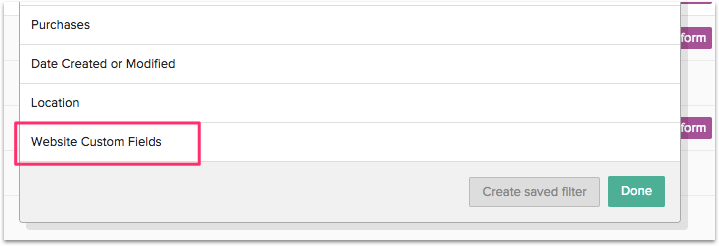
Note: you must scroll down because the default view doesn’t show ‘Website Custom Fields’.
Click on ‘Website Custom Fields’ and then check the box for ‘Submitted Online Form’ and press ‘Done’:
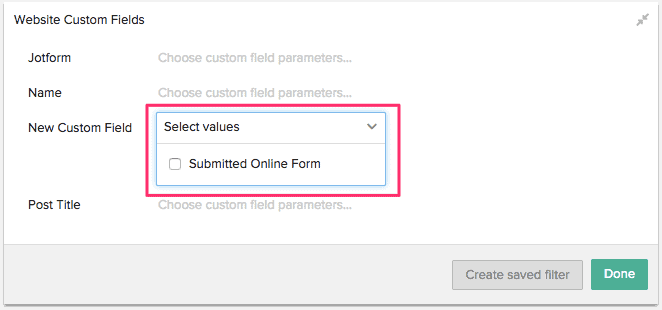
In the ‘Website’ view you’ll now see only those prospects who submitted your online form.
Just put a check against each of the records and you can start the Outreach with your email that the post is now live.
Conclusion
I’ve just gone live with the biggest roundup post I’ve ever done – 71 experts commenting on their email preferences. Even though it involved about 4 times as many contributors as any of my previous roundups, the outreach part was a breeze!
I can’t overstate how easy it is to put together a roundup using BuzzStream.
Of course, BuzzStream isn’t the only option. Here are some BuzzStream alternatives:
- Mail Shake – $59 p/month
- BuzzStream – starts at $24 p/month
- Ninja Outreach – $119 p/month
- Scrunch – Free (limited version), $199 p/month
- Pitchbox – get an obligation-free quote
- Snov.io – starts at $33 p/month
So, why not give it a go?
Automate your next roundup post and see the difference!