Lead magnets are a vital part of list building.
But sooner or later, you’re going to run into a problem: multiple different lead magnets that need to be delivered to different subscribers.
One way to get around this is to use software that simply redirects the subscriber to the lead magnet they signed up for.
After the visitor presses the ‘Join’ or ‘Subscribe’ button, they get taken to a PDF file containing the lead magnet. This solution is okay, and a lot of people use it.
However, there are two problems with this method of lead magnet delivery.
Lead Magnet Delivery Problem #1
It’s a good practice to use double opt-in for your email list.
But here’s the problem:
When your subscriber presses ‘subscribe’ (or ‘Join’) where do you send them?
If you’re using double opt-in, you should ideally redirect them to a page where you tell them they’ve just been sent a confirmation email and they need to click on the link in that email.
And that means…
…you can’t redirect them to a PDF file containing your lead magnet (which is what a lot of people currently do)
Lead Magnet Delivery Problem #2
As you know, it’s vital to know where your subscribers are coming from.
After all, if you don’t know where they’re coming from, how can you optimize what you’re doing to get more subscribers?
It’s quite easy to track where subscribers are coming from in Google Analytics. All you need is a page that all subscribers see after they enter their details.
The problem is (again):
If you’re redirecting new subscribers to a ‘subscriber thank you’ page, you won’t be able to redirect them to the lead magnet they just signed up for.
Solution #1 – Put All Your Lead Magnets On One Page
This is one way to handle lead magnet delivery:
After a person confirms their subscription, they automatically receive another email containing a link to a page that has all of your lead magnets.
Option #1 is a good solution and many bloggers and web marketers use it.
You might think “why should a subscriber get all my lead magnets – isn’t that a waste?”
But look at it this way: your lead magnet is simply a way to get someone to join your list. Once they’ve joined you can’t get them to join again (they can’t subscribe more than once).
So why not give them access to the whole collection of lead magnets?
However, there are two drawbacks to this approach:
Firstly, you’re going to have to password-protect your lead magnet download page because it’s a valuable resource.
But sooner or later people are going to start sharing the link with each other.
Secondly, because the page contains multiple lead magnets, your visitors are going to be coming back to it again and again and this is going to skew the data collection within Google Analytics.
And that leads me to the second solution (the one I use).
Solution #2: Send a Different Email for Each Lead Magnet
This is the most advanced form of lead magnet delivery:
It’s an automated system where each subscriber receives a different email according to which lead magnet they signed up for.
That email will contain the download link for that particular lead magnet.
The following lead capture tools offer this kind of lead magnet delivery:
- LeadPages ($25 p/month)
- ConvertKit ($29 p/month)
- Active Campaign ($17 p/month)
But there’s a cheaper option – it’s the one I use and I’m going to show you, screenshot by screenshot, how to set it up.
Thrive Leads – Lead Magnet Delivery
Thrive Leads is considered by many to be the best WordPress
In Thrive Leads ‘lead magnet delivery’ is called ‘Asset Delivery’ and that’s the term I’ll be using from here on.
Setting up asset delivery within Thrive Leads is part of setting up an opt-in form.
So I’m going to walk you through the whole process of setting up a Thrive Box (a type of opt-in form within Thrive Leads).
Are you ready?
Here we go:
First thing you need to do is sign up for an email delivery service (also called ‘Transactional Email’).
There are plenty to choose from:
- Amazon SES
- SendPulse
- Postmark
- SparkPost
- Mandrill
- SendGrid
- Pepipost
- EmailSuccess
- Mailjet
- Sarv Transactional Email Service (Sarv TES )
I use Amazon SES.
It’s very reliable and it has the advantage that it’s free for the first 62,000 emails per month.
Setting up Amazon SES is quite complicated and you may need to exercise some patience during this step.
Once you’ve set up Amazon SES, the rest is a breeze:
I had about 10 lead magnets and it took me less than 2 hours to set them all up within Thrive Leads Asset Delivery System.
Step #1: Set up your ‘asset delivery’
On the Thrive Leads dashboard click on the ‘Advanced Features’ link at top right:

In the drop down menu click on ‘Asset Delivery’:
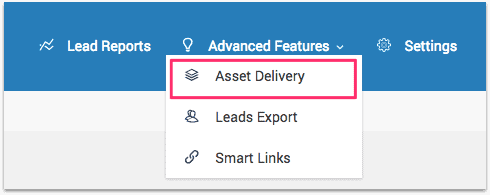
In Thrive Leads, each Lead Magnet belongs in its own ‘Asset Group’. You’ll need to create an Asset Group for each Lead Magnet.
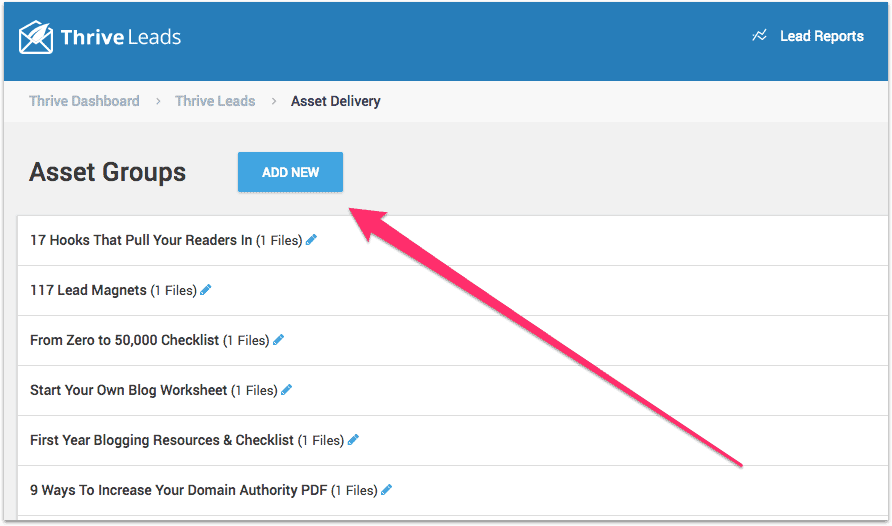
On the next screen click ‘Add New’:
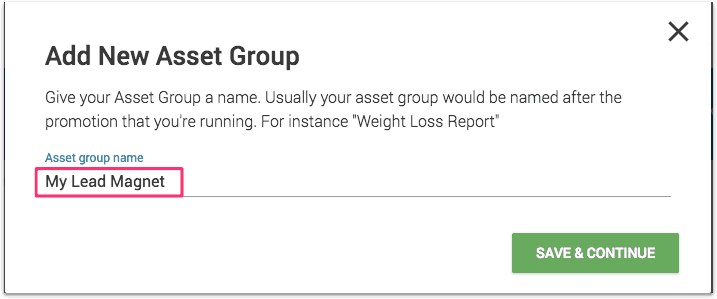
Give your Asset Group a name and click ‘Save & Continue’:
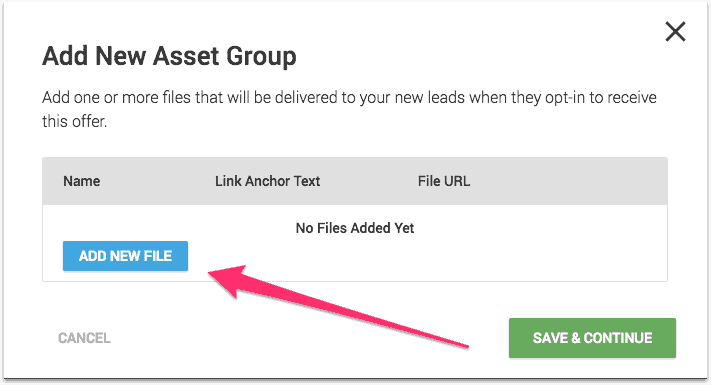
On the next screen, click ‘Add New File’:
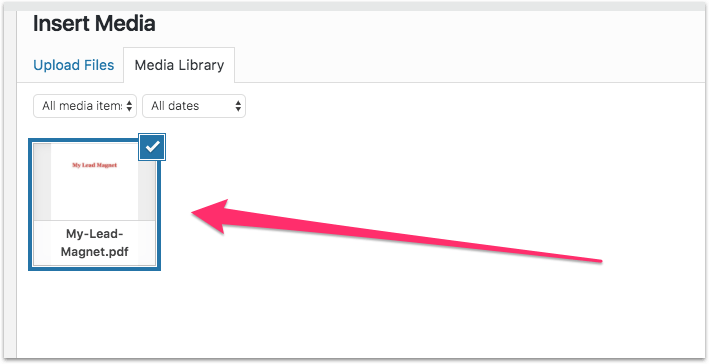
Next, locate and select your PDF (the lead magnet) within the WordPress Media Library:
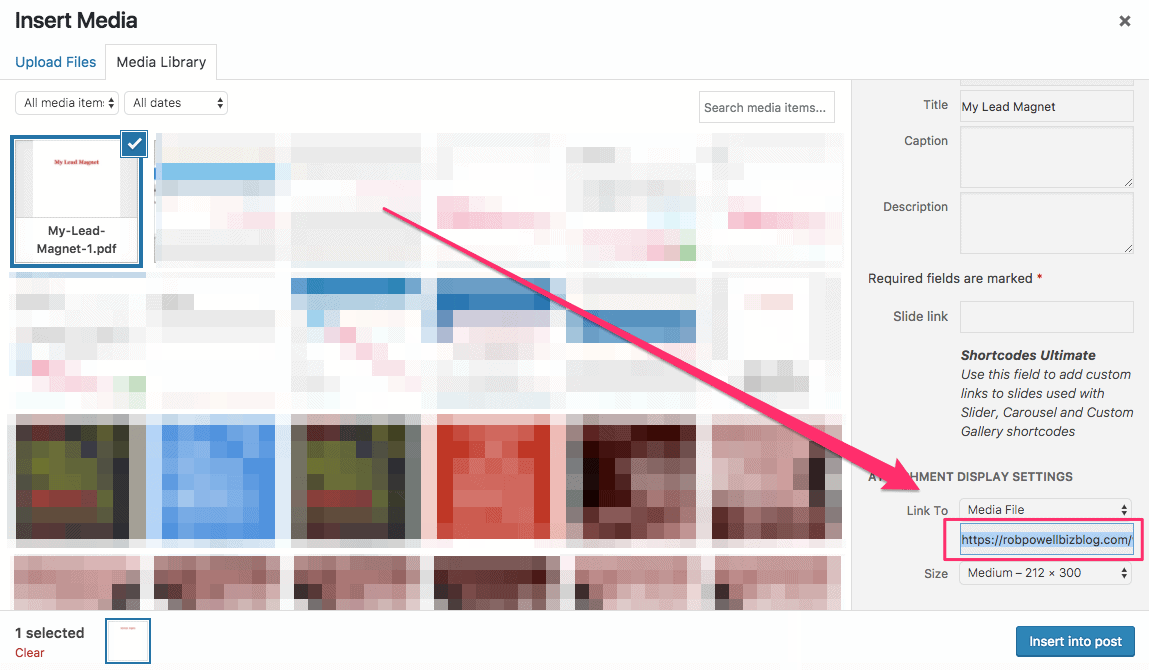
Now move your cursor down to the bottom right corner of the window and double-click on the URL of the PDF file (the Lead Magnet). Copy and paste this URL to a text editor, as you will need it later on.
Then click ‘Insert Into Post’:
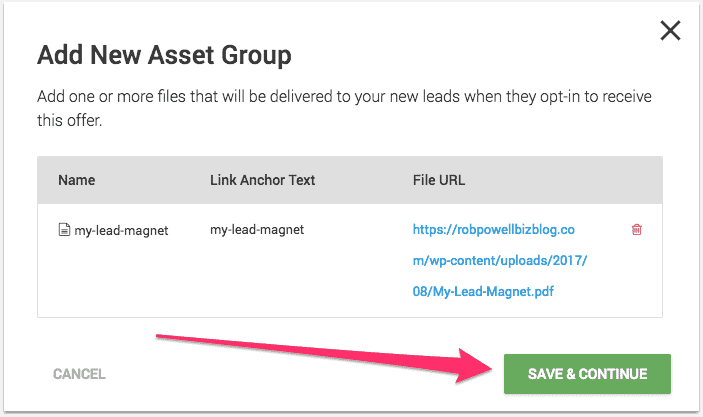
On the next screen you’ll see a summary of your new Asset Group. Click ‘Save & Continue’:
On the next screen, find your newly created Asset Group and click on the downward pointing caret:

At this point you could, if you wanted, add another file to the Asset Group. You would only do this, however, if your lead magnet consists of two or more separate files.
In our case, we’re just going to click on ‘Customize Email’:

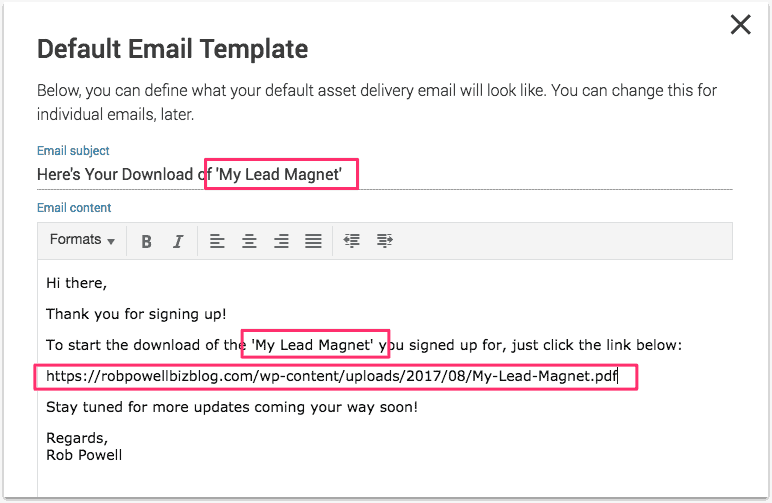
On the next screen, you need to customize the email that will be sent out for this Asset Group (or Lead Magnet).
You’ll need to customize:
- The name of the Lead Magnet in the subject of the email
- The name of the Lead Magnet in the body of the email
- The download link in the body of the email
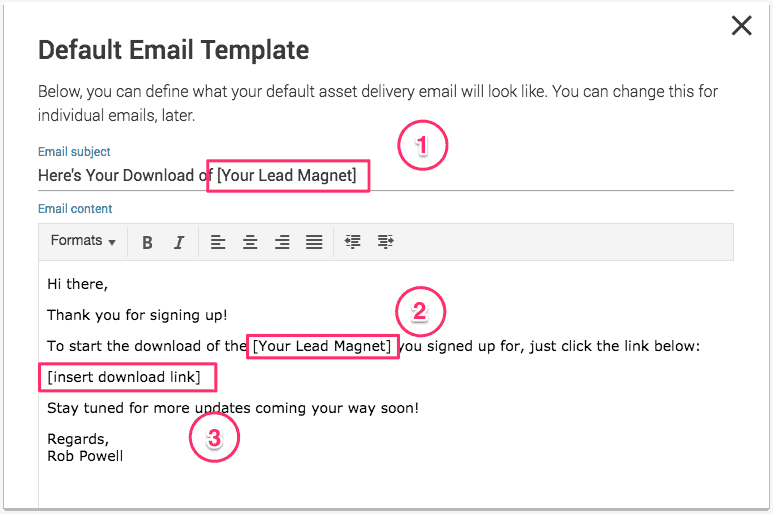
This is what it should look like when you’ve finished (remember to remove the square brackets):
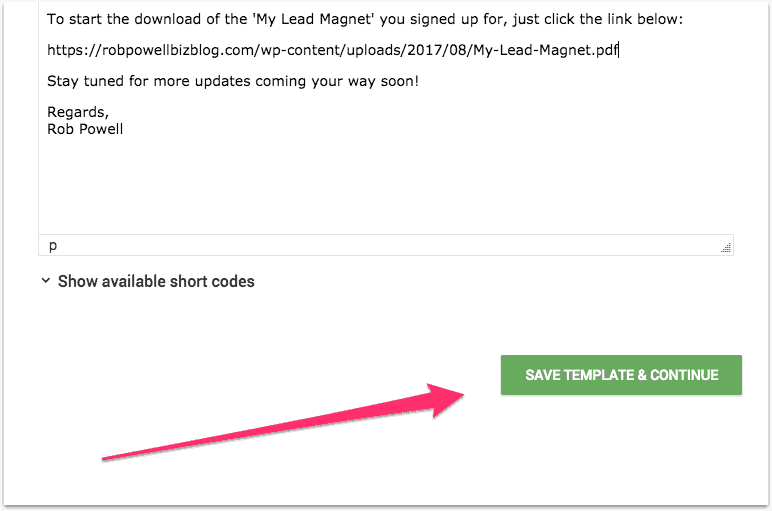
Then scroll down and click ‘Save Template & Continue’:
Step #2: Create the opt-in form
Now just create your Thrive opt-in form in the normal way.
In this case I’m going to create a ‘Thrive Box’ and I’ll give it the same name as the Lead Magnet:
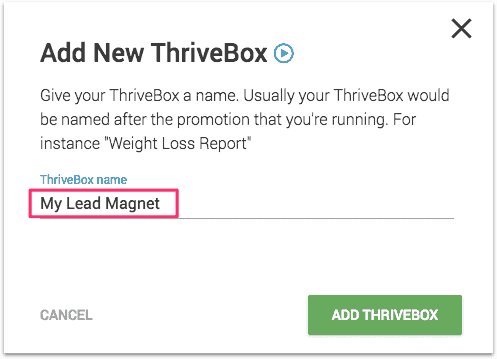
Then click ‘Add Thrive Box’.
Next, in the list of Thrive Boxes, find the one you just created and click ‘Edit’ on the right side of the window:

On the next screen click ‘Create Form’:
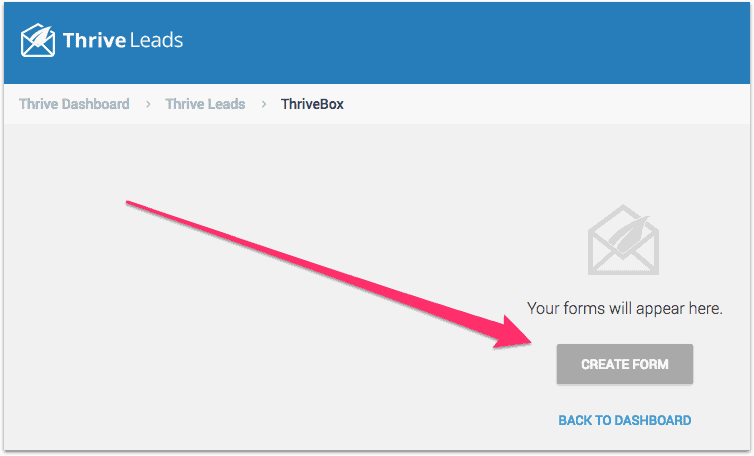
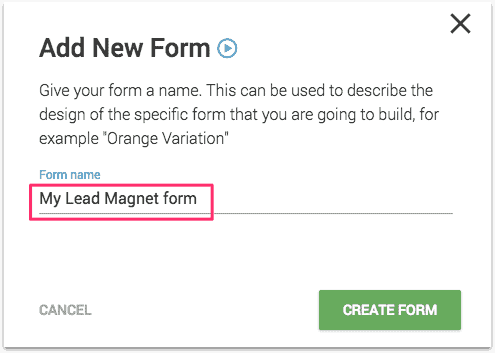
Give the form a name and click ‘Create Form’:
On the next screen, click on the form’s Edit button:

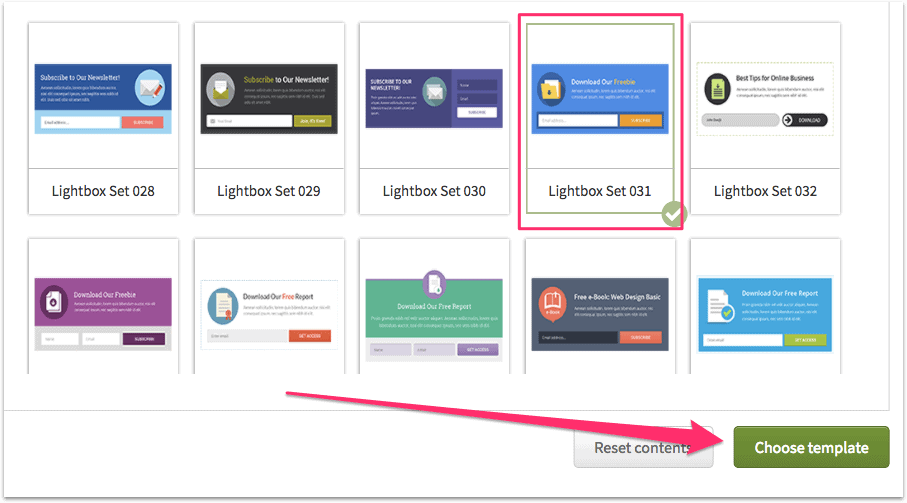
Choose an opt-in form template and then scroll down and click ‘Choose Template’:
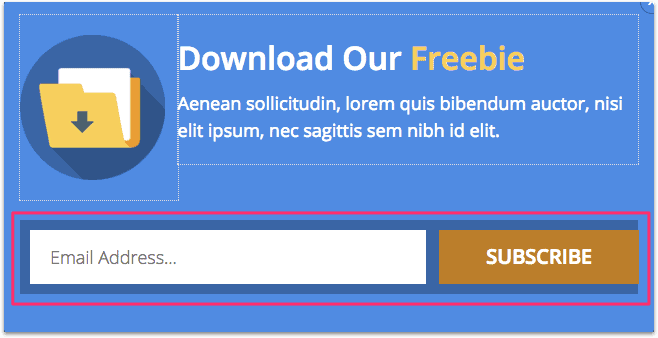
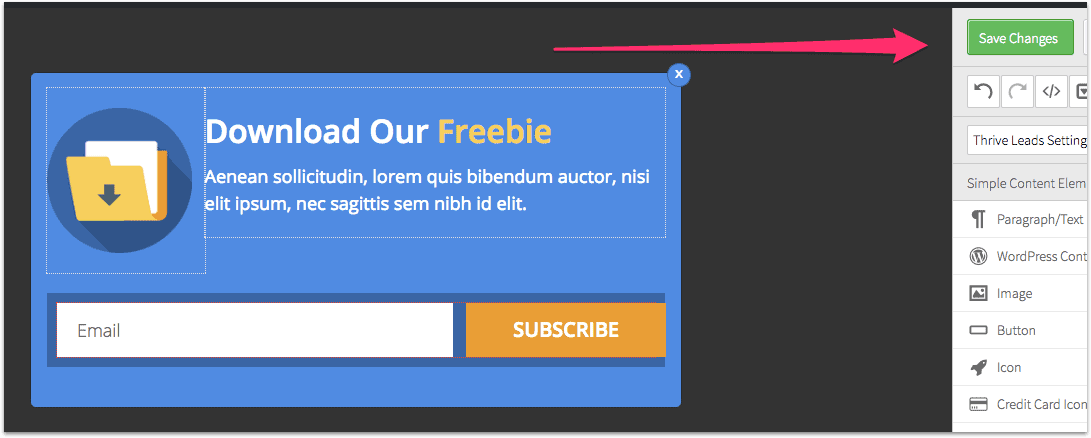
On the next screen, you need to customize the text of your opt-in form by clicking on the elements that you want to change.
You can also change the background colours, the image, the font family and size etc. Everything that you see on the opt-in template can be customized.
Once you have it customized and formatted correctly, click anywhere within the email input field of your opt-in form:
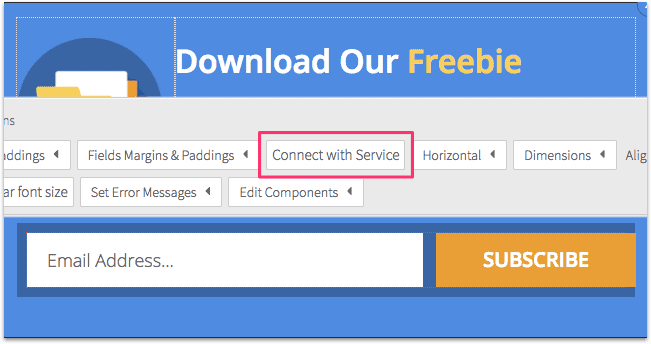
A formatting bar will pop up. Click on the ‘Connect with Service’ option:
Click ‘Create a New Connection’:
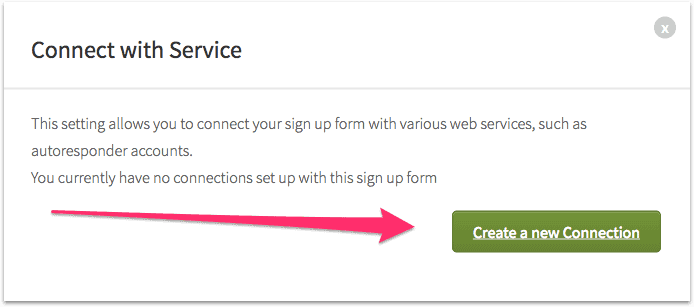
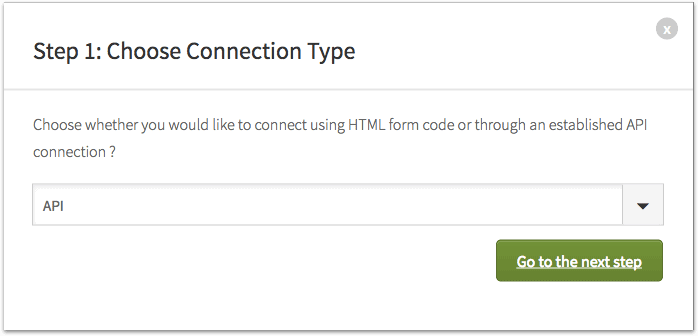
On the next screen, choose ‘API’ connection:
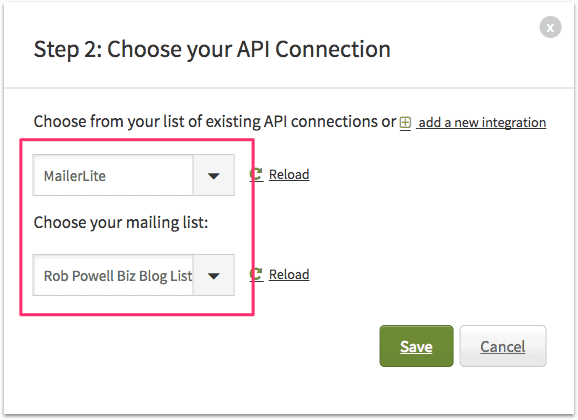
Next, choose your Email Marketing Platform (Email Service Provider) and the name of your List:
On the next screen you need to:
- Check the box that says ‘Enable Asset Delivery’
- Choose the Asset Group that you just created (in this example, ‘My Lead Magnet’).
- Set the action after signup to ‘Redirect to URL’
- Enter the URL of your subscriber ‘thank you page’
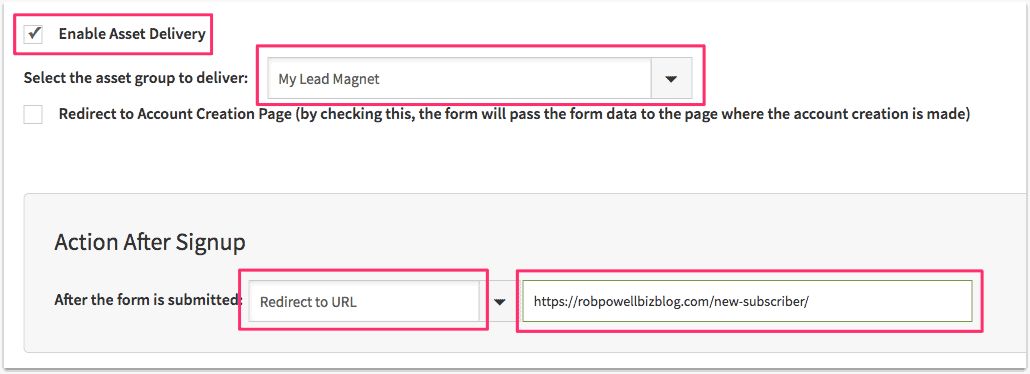
Once you’ve done that, scroll down and click ‘Save’ and on the next screen click ‘Save Changes’:
Now go back to the Thrive Leads dashboard and in the list of Thrive Boxes, find the Thrive Box you created and click the button to copy the shortcode:

To use this opt-in form as a content upgrade within an article or blog post, just drop that shortcode into the relevant area of your article:
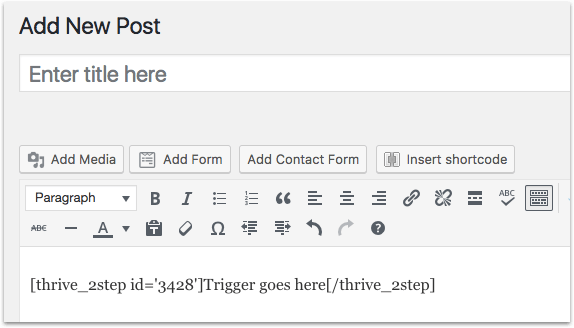
Then change the ‘Trigger text goes here’ to something like ‘Click here’ and use a text editor to change the color of the trigger text to blue:
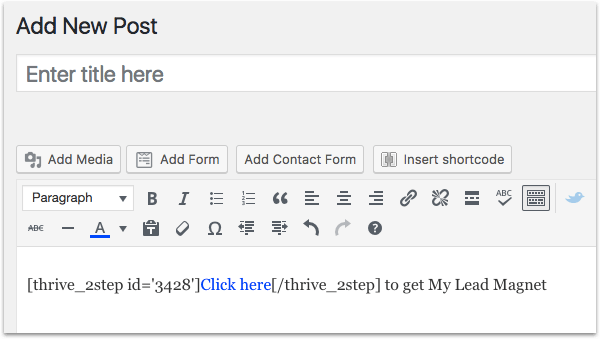
And that’s it!
You’ve just set up an opt-in box with lead magnet delivery (aka asset delivery).
Do this for each new lead magnet you offer.
It means that each subscriber will get an email containing a link for the specific lead magnet that they signed up for – much more targeted than sending them to a generic resource page containing links to a dozen other lead magnets.
It also means you’ll be able to redirect every new subscriber to a ‘thank you’ page that you can then use in Google Analytics to track where your subscribers are coming from.
And how much is Thrive Leads?
It’s a one-time payment of $67. That’s very reasonable compared with other forms of lead magnet delivery…considering this is one of the most advanced lead capture tools on the market.
Conclusion
Lead magnets are a vital part of successful list-building. If you just have one or two lead magnets that go to every new subscriber, that’s quite simple.
But where it gets complicated is when you have different lead magnets for different blog posts. These are called ‘content upgrades’.
You can quickly end up with dozens of different lead magnets going to different subscribers, depending which piece of content they were reading when they subscribed.
But follow the strategy outlined in this article, and you’ll avoid the headaches and pitfalls of multiple lead magnets.
More Articles About Email Marketing
- How Email Marketing Works in 2022 – The Definitive Guide
- 10 Best Email Marketing Services & How To Choose
- How To Use ConvertKit – 11 Useful Features You Need To Know
- 21 Headline Analyzers For Better Click-Through Rate (CTR)
- How To Build Your List on Medium & Grow Your List Fast
- How To Deliver Content Upgrades For Free In 7 Easy Steps
- 10 Best Lead Capture Tools For List Building in 2022
- 39 Awesome Exit-Intent Popup Tips To Grow Your List Faster
Hey. Tell me please. What do I need to write in support of amazon so that they withdraw my account from the sandbox?
I already sent them two requests in which I described in detail what I was going to send, and how. And that I send letters only to those who requested my letter.
I’m desperate. Help me if you can.
Hi Anton,
I don’t have any first hand experience on this issue but you may find this article helpful:
Moving Out of the Amazon SES Sandbox
Best, Rob.
Thank you for this article. It is very clear. I am however still having an issue with thrive leads. I recently signed up with thrive leads for optins and Postmark for transactional emails but I do not know how to create a mailing list for Postmark. I created my optin form and in the connect to service box I add the Postmark API connection but then I am prompted to select a mailing list. I have no list options at this point and have zero clue on how to create this. I have searched far and wide on google for help but nothing yet. Can you help?
Hi Suelen,
I just had a look at Postmark and it’s not the best option to be using with Thrive Leads. Postmark is a ‘transactional email service’ but what you need is an ’email marketing and automation service’.
I use MailerLite (not an affiliate link), which is free until you reach 1000 subscribers. Even then it’s only $15 per month.
MailerLite works really well with Thrive Leads. I can recommend it.
In MailerLite, go to ‘Subscribers’ in the upper-level menu and then click on ‘Groups’ and create a group. In MailerLite, a group is a ‘mailing list’. When Thrive Leads asks to specify a ‘mailing list’, choose the group you just created. It’s very simple.
Hope this helps 🙂
Rob.
This is a single opt-in scenario. Is there any way to use asset delivery with a double opt in using MaileriLe and Amazon SES?
Hi David, thanks for the question. It should be possible. Instead of delivering the asset in the first email, you would deliver it in the second email (i.e. once the subscriber has confirmed). Everything else would be the same. Hope this answers your question, Rob.