Creating an eCourse is one of the most effective ways of monetizing your website.
As people all over the world turn to the Internet to make a living, the skills we need are being taught not in Universities and technical colleges but in online courses.
I’m a course creator (and an avid course-taker) and in this article I’ll show you:
- how to create an online video course
- how to create slides to accompany your audio recording
- what external mic to use
- a workflow for creating your course quickly and easily
- how to get the best audio settings in Screenflow
- #1. Keep It Simple
- #2. Audio is the Backbone
- #3. Find a Workflow that Works
- #4. Prepare a Script
- #5. Headers for PowerPoint Slides
- #6. Keep Bullet Points Short
- #7. Markup Screenshots
- #8. Use a Good External Mic
- #9. Use a Teleprompter
- #10. Standardize Your Audio Settings
- Conclusion
- More Articles About Online Learning
#1. Keep It Simple
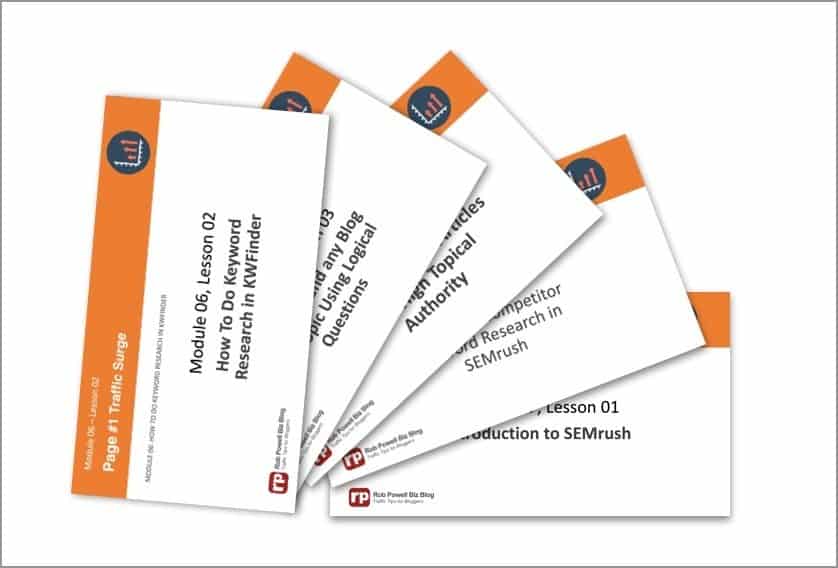
I started off creating videos where the bullet points were part of the video itself. I use Screenflow (the Mac alternative to Camtasia). I was creating making work for myself by creating animated text from within Screenflow itself.
Big mistake!
If you’re creating a standard-length video course (mine is 12 modules with 31 lessons) you need to find a fast and efficient way to create your videos. Otherwise you’ll never get the course finished.
This is the method I eventually settled on:
- Create bullet point slides in PowerPoint
- Use these PowerPoint slides as the background to your audio
- Only create video clips when there’s something you need to show ‘live’ (e.g. how to create a mind map)
#2. Audio is the Backbone
When you make a training video there are lots of moving parts all competing for your attention. I felt quite overwhelmed by it all.
Until I realized something: The backbone of my video was the audio track. Everything else (the PowerPoint slides, the screenshots, the video clips) hung off that audio track.
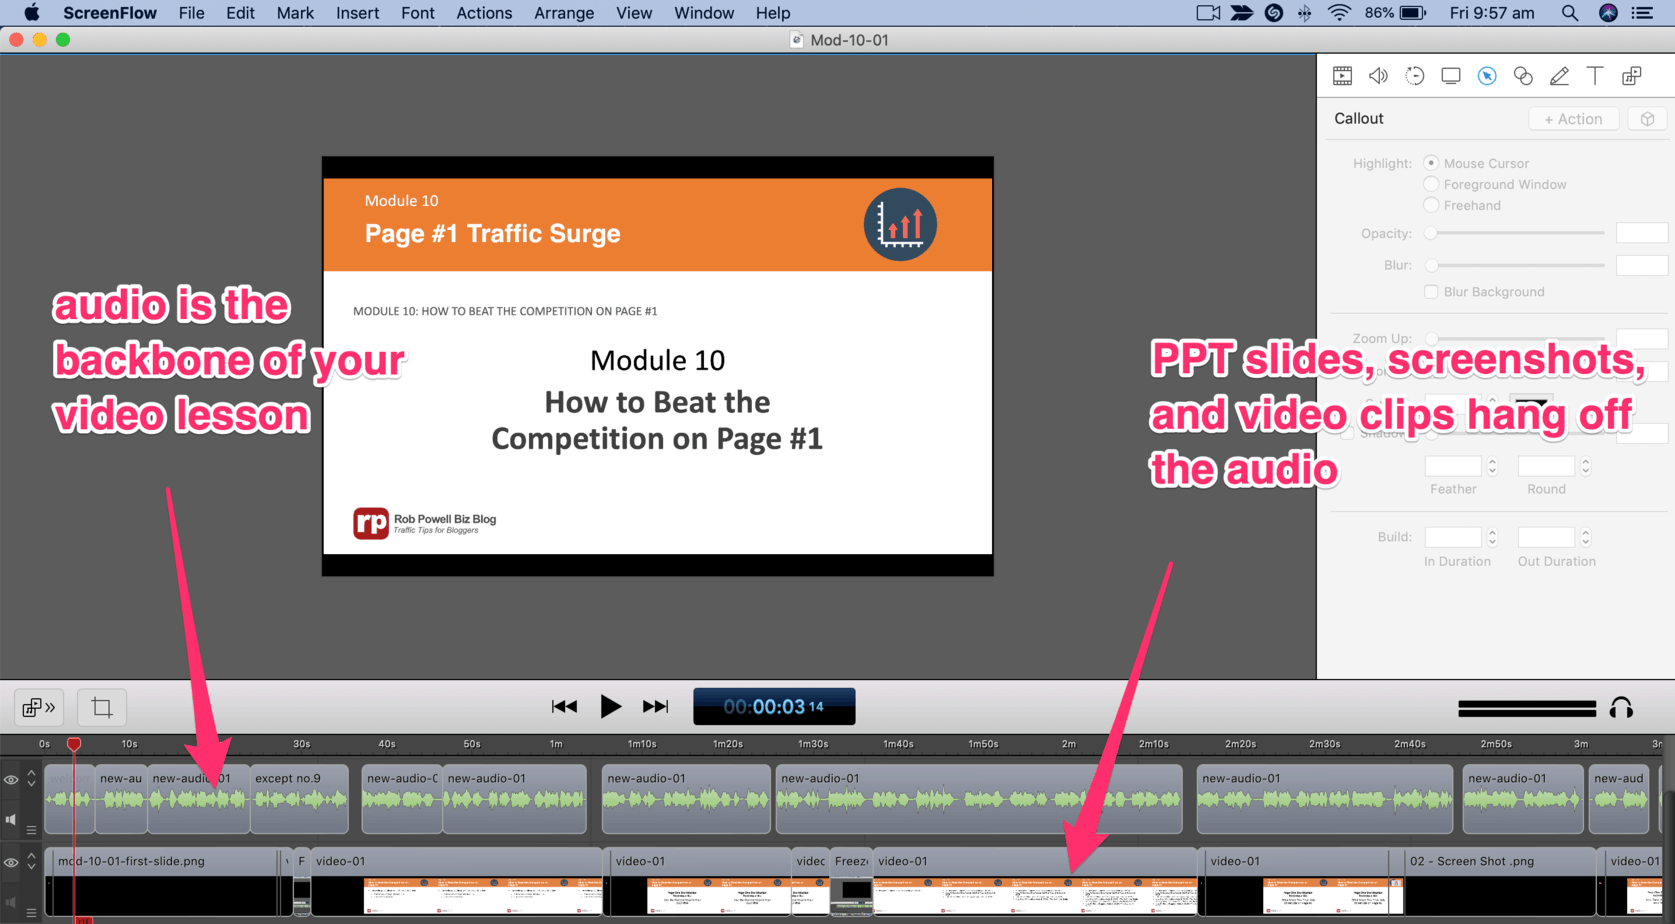
Once I understood that the audio recording was the backbone of each video lesson, everything else fell into place.
#3. Find a Workflow that Works
It took me days to discover a workflow that works. This is the basic workflow that I finally settled on:
- Write the text of the lesson in a Word document
- Record it as an audio file within Screenflow
- Load the audio file into the Screenflow Timeline and edit the audio
- If you garble a sentence don’t stop the recording: just say it again and then cut out the garbled bit in the editing stage
- Once you’re happy with the audio, create PowerPoint slides containing bullet points for your main points
- Put the PowerPoint on ‘Slideshow’ and record a video of your desktop while playing the audio that you recorded in Step 2.
- Use the arrow keys on your keyboard to move the slides forward as you go play the audio file
- You’ll end up with a video of your PowerPoint slides that is synchronized with your audio track
#4. Prepare a Script
When I started recording my video course, I had just finished an amazing video course by a husband and wife team who didn’t use a script. They had talking points, but they spoke spontaneously.
I liked their presentation and I really wanted to do that.I tried it over and over again.
It just didn’t work. I would forget what my next point was. There’d be a pause. I would keep going, stumble again. And eventually I would just freeze up altogether.
After a whole day of screaming at myself and my computer I eventually had to admit that the spontaneous method wasn’t for me.
From then on, I spoke from a script.
Which is the best method?
Hard to say. The listener will get a better idea of your personality if you use the spontaneous method. But on the other hand, the material will be presented in a more coherent and organized way if you speak from a script.
In the end, it’s about who you are and what works for you.
#5. Headers for PowerPoint Slides
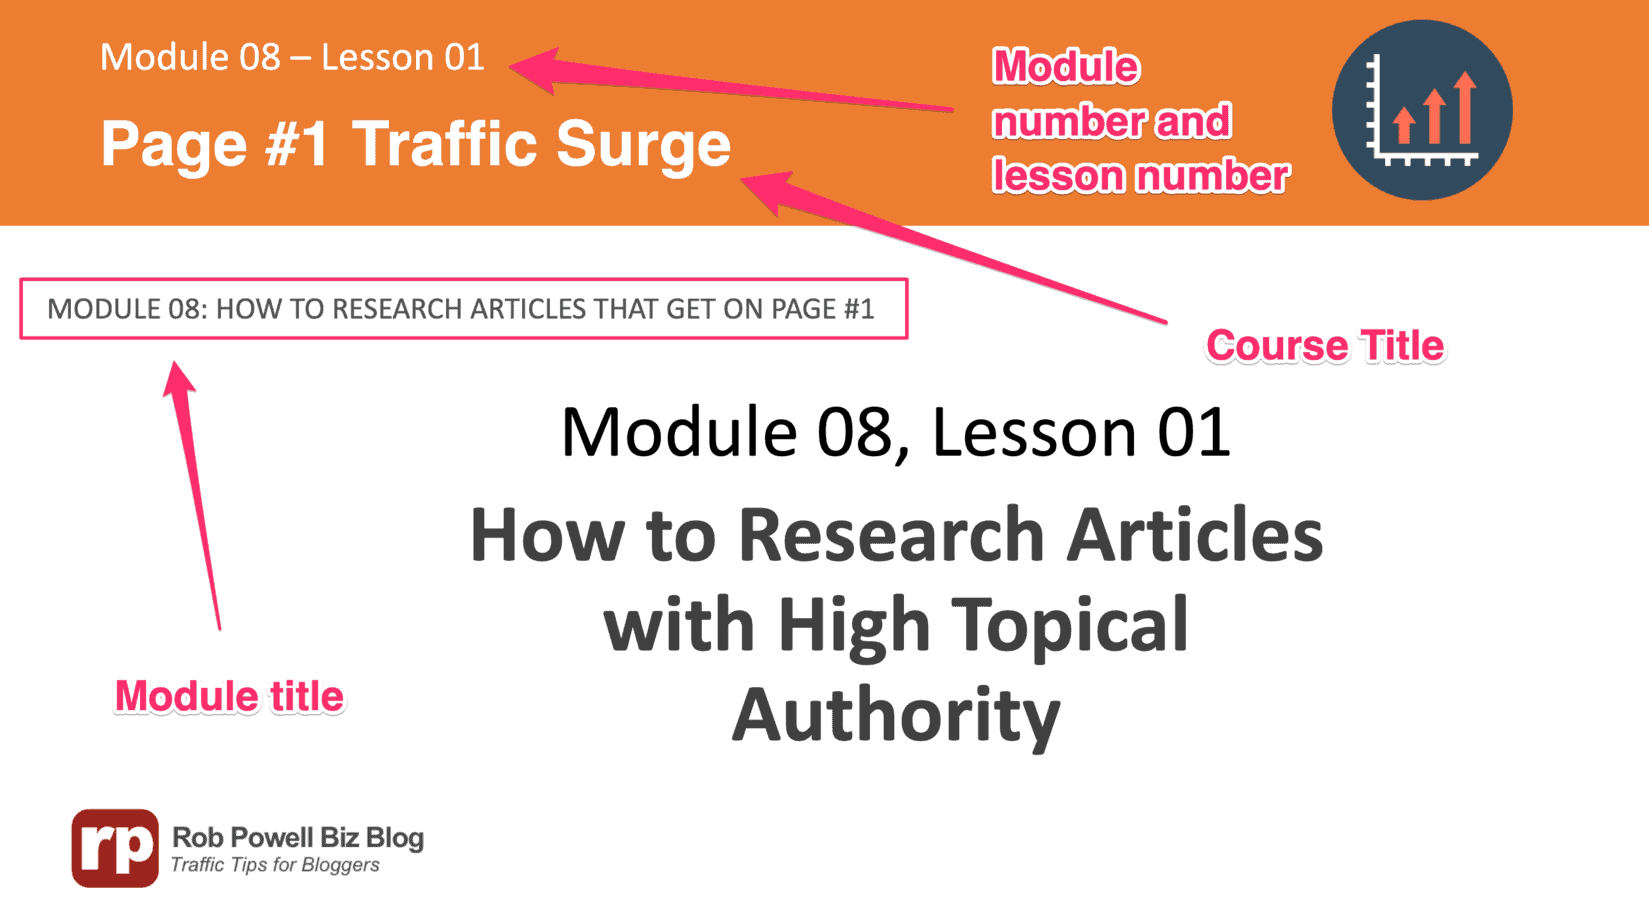
The headers for your PowerPoint slides should tell the student where they are in your course.
That means the header should contain the module number (or chapter number) and the lesson number, as in the example below:
#6. Keep Bullet Points Short
Keep your bullet points very short.
If the bullet point spills over to the next line, it’s too long.
Use the audio to expand upon the bullet point. Remember that the bullet point is there to give the student something to focus on while you’re talking.
#7. Markup Screenshots
If you need arrows and other annotations to draw attention to details in your screenshots, do them in the screenshot itself (using Skitch, SnagIt, Jing or another screenshot editor).
Annotating screenshots within the video software is fiddly and there’s potential for the annotations to get out of sync with the screenshots.
#8. Use a Good External Mic
This might come as a surprise. But the most important component of your training video is not the video but the audio. The audio is far more important than the visual component.
If people cannot hear clearly what you are saying that’s a far bigger problem for them than if the visuals are a bit blurry or lacking in sharpness.
So, invest in a good external microphone.
The one I use is the Audio-Technica ATR2100-USB:
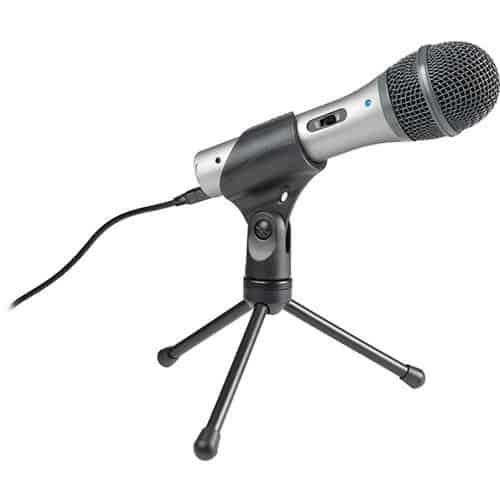
I highly recommend it – it gives crisp, good quality sound.
I would suggest you get a good tripod, so that you can position the mic exactly where you need it (the tripod that comes with the mic won’t allow you to do that).
Tip: Keep your mouth as close to the mic as you can. I found that if my mouth was more than 6 inches from the mic, the audio had a slight ‘echo’ effect.
#9. Use a Teleprompter
When you are recording a video of the PowerPoint Presentation, you need to sync it with the audio. This is how I do it:
- Start a recording in ‘Record Desktop’ mode (this is a video recording of whatever app you are currently using – in this case PowerPoint)
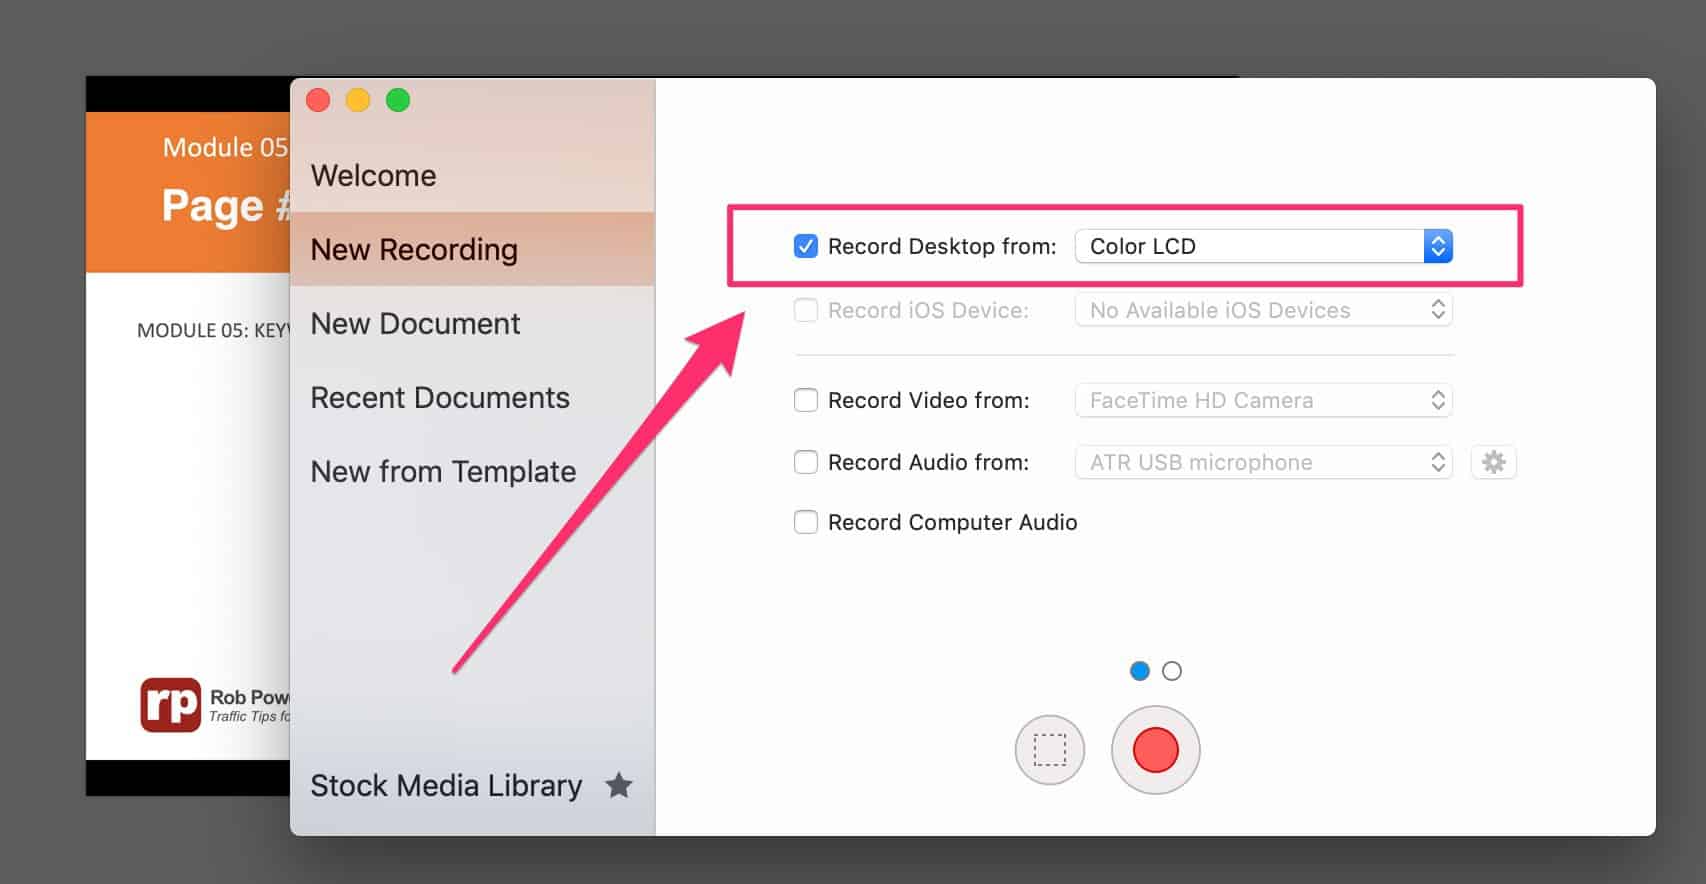
- Then hit the ‘Play’ button in Screenflow, so that the audio track (your narration) is playing in the background
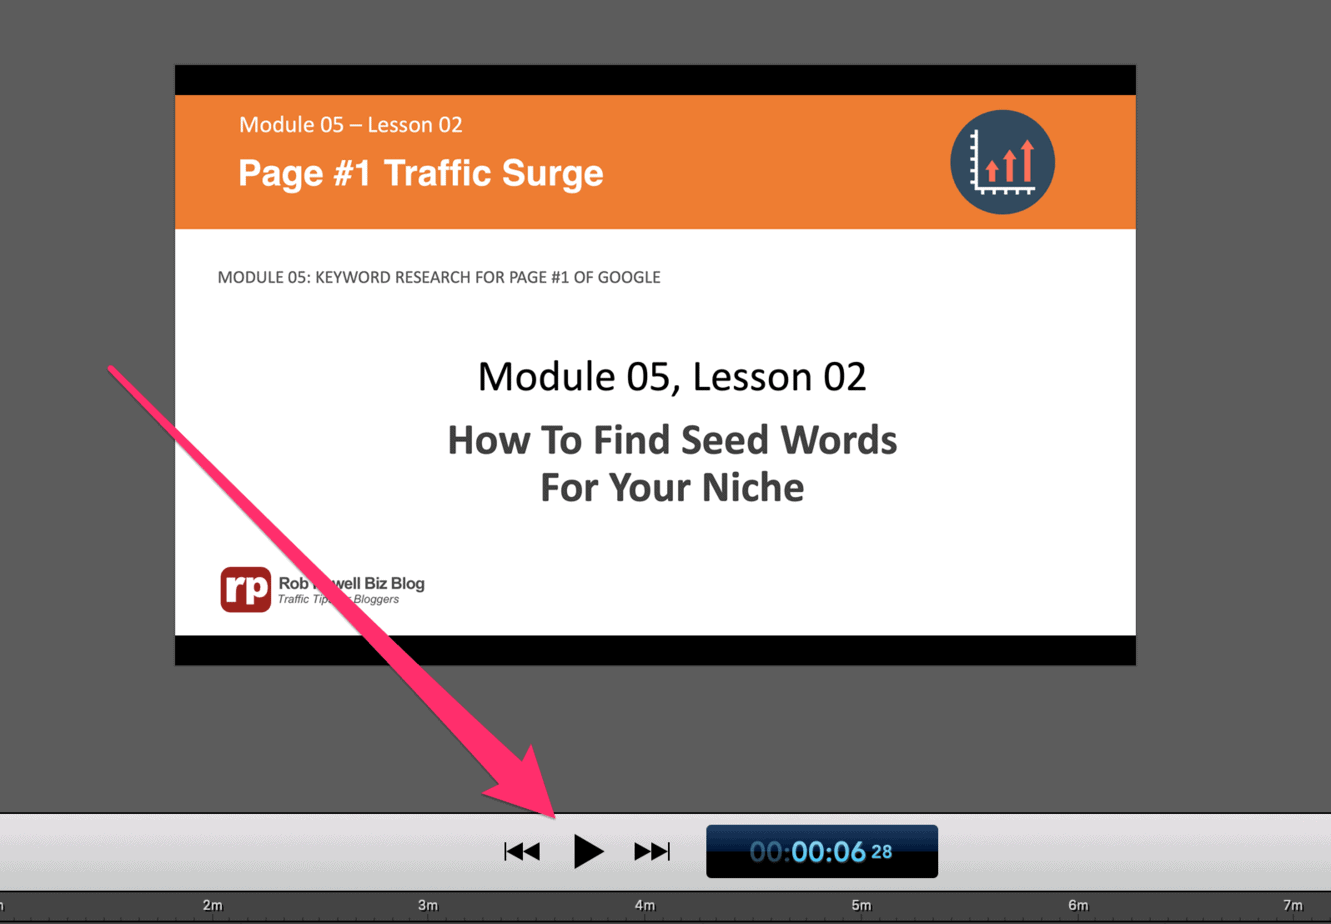
- Then flip back from Screenflow to the PowerPoint Presentation and click through the slides so as to sync them with the audio.
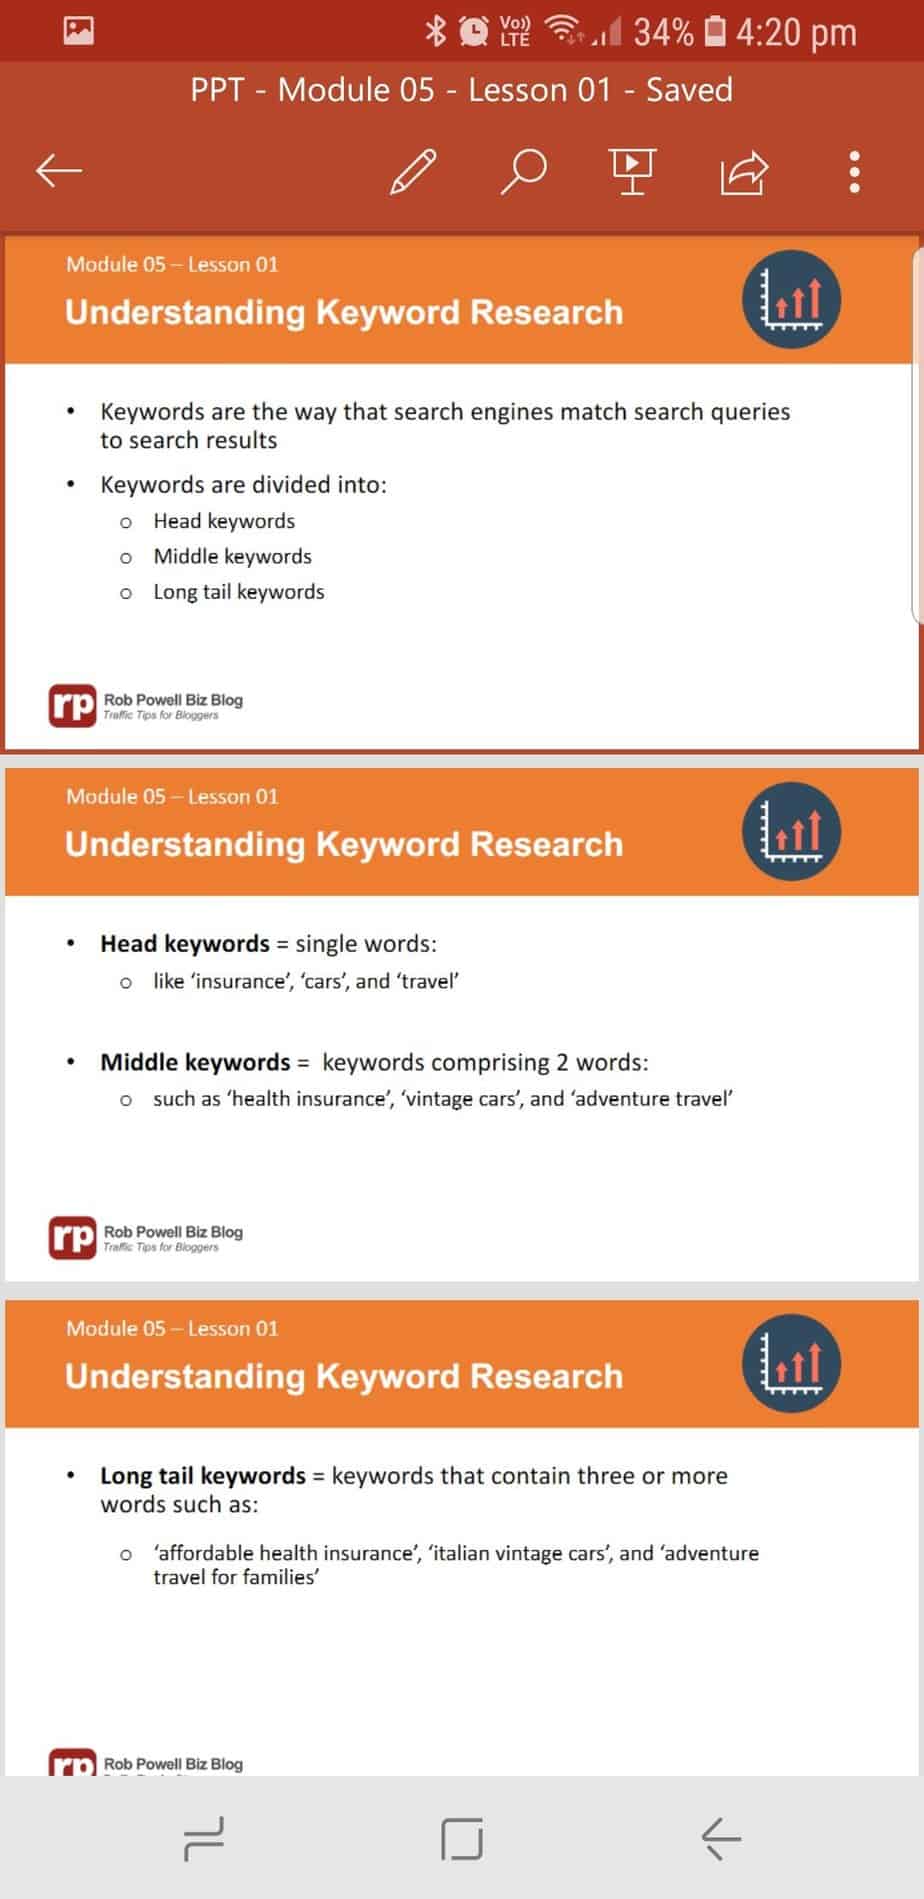
Tip: It’s much easier to sync the PowerPoint slides with the audio if you know what the next PowerPoint slide is going to be. The way to do this is to have the PowerPoint Presentation on your smartphone.
Here’s how to do it:
- Install PowerPoint for Mobile on your smartphone.
- Then upload the PowerPoint Presentation to Google Drive.
- Then open then the PowerPoint Presentation from within the mobile PowerPoint app:
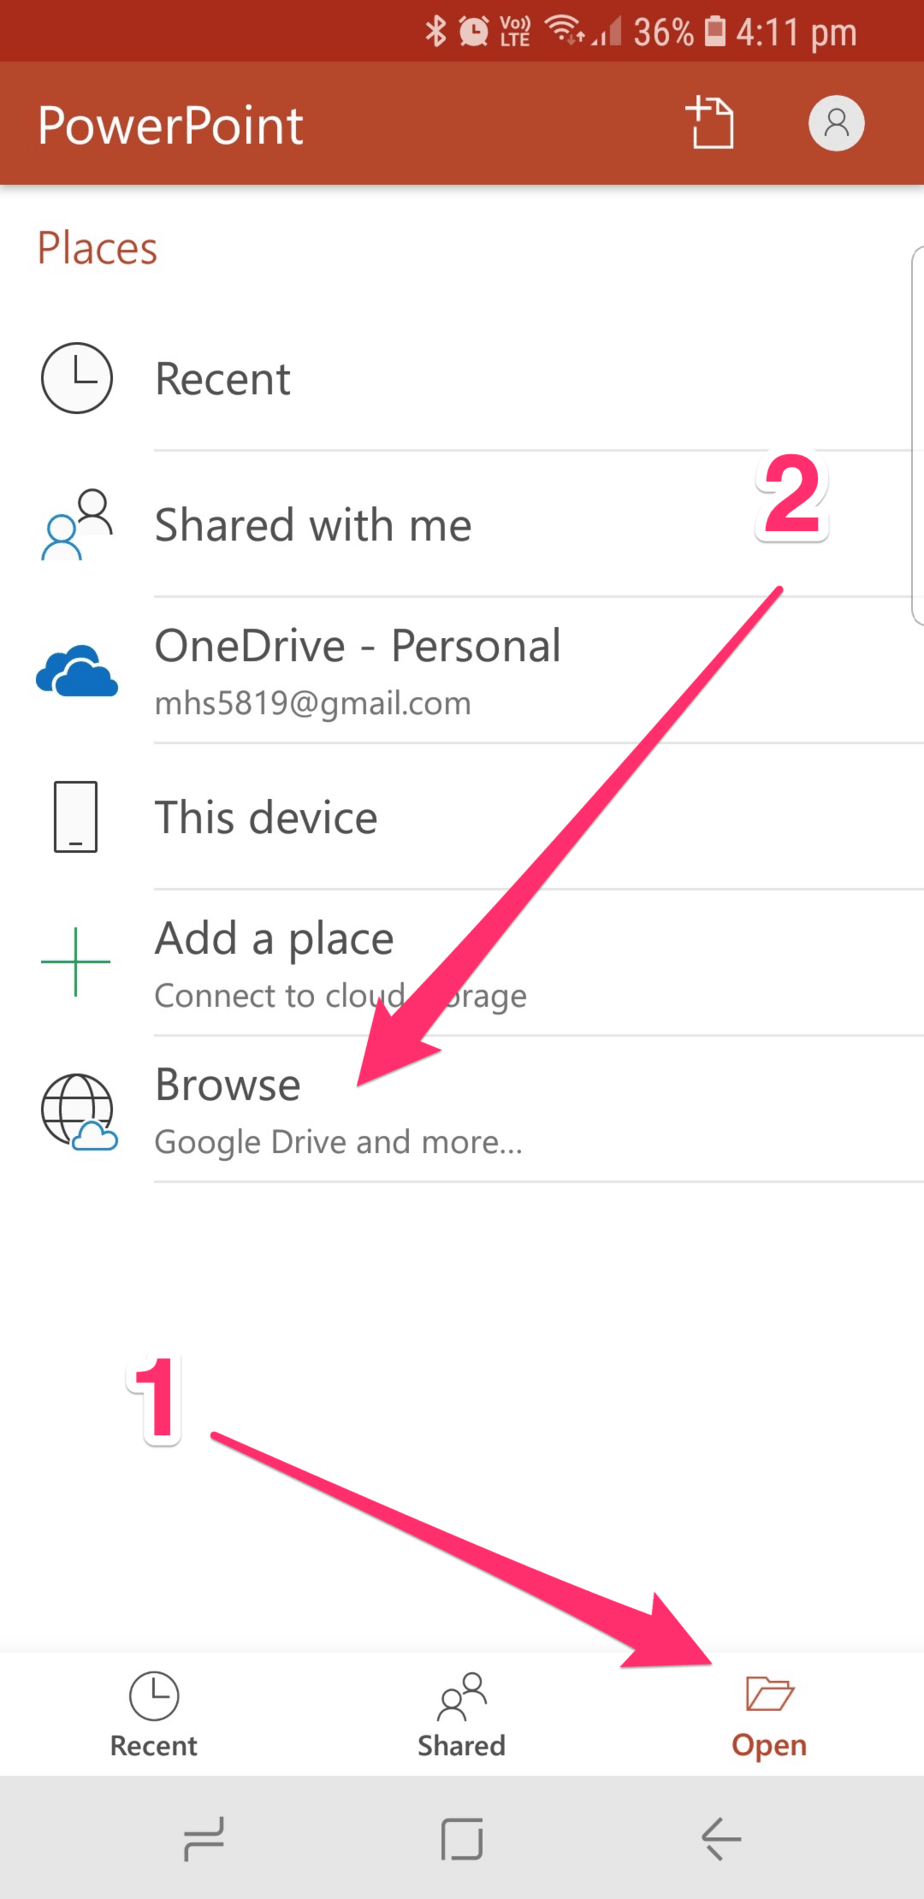
You’ll then be able to see which PowerPoint slide is coming next. This makes it much easier to sync the PowerPoint slides with the audio:
#10. Standardize Your Audio Settings
Ideally, you should have the same audio settings for every lesson in your eCourse.
That way, your students won’t have to adjust the volume with each new lesson.
These are the settings that worked for me:I record with the recording volume set at 125%:
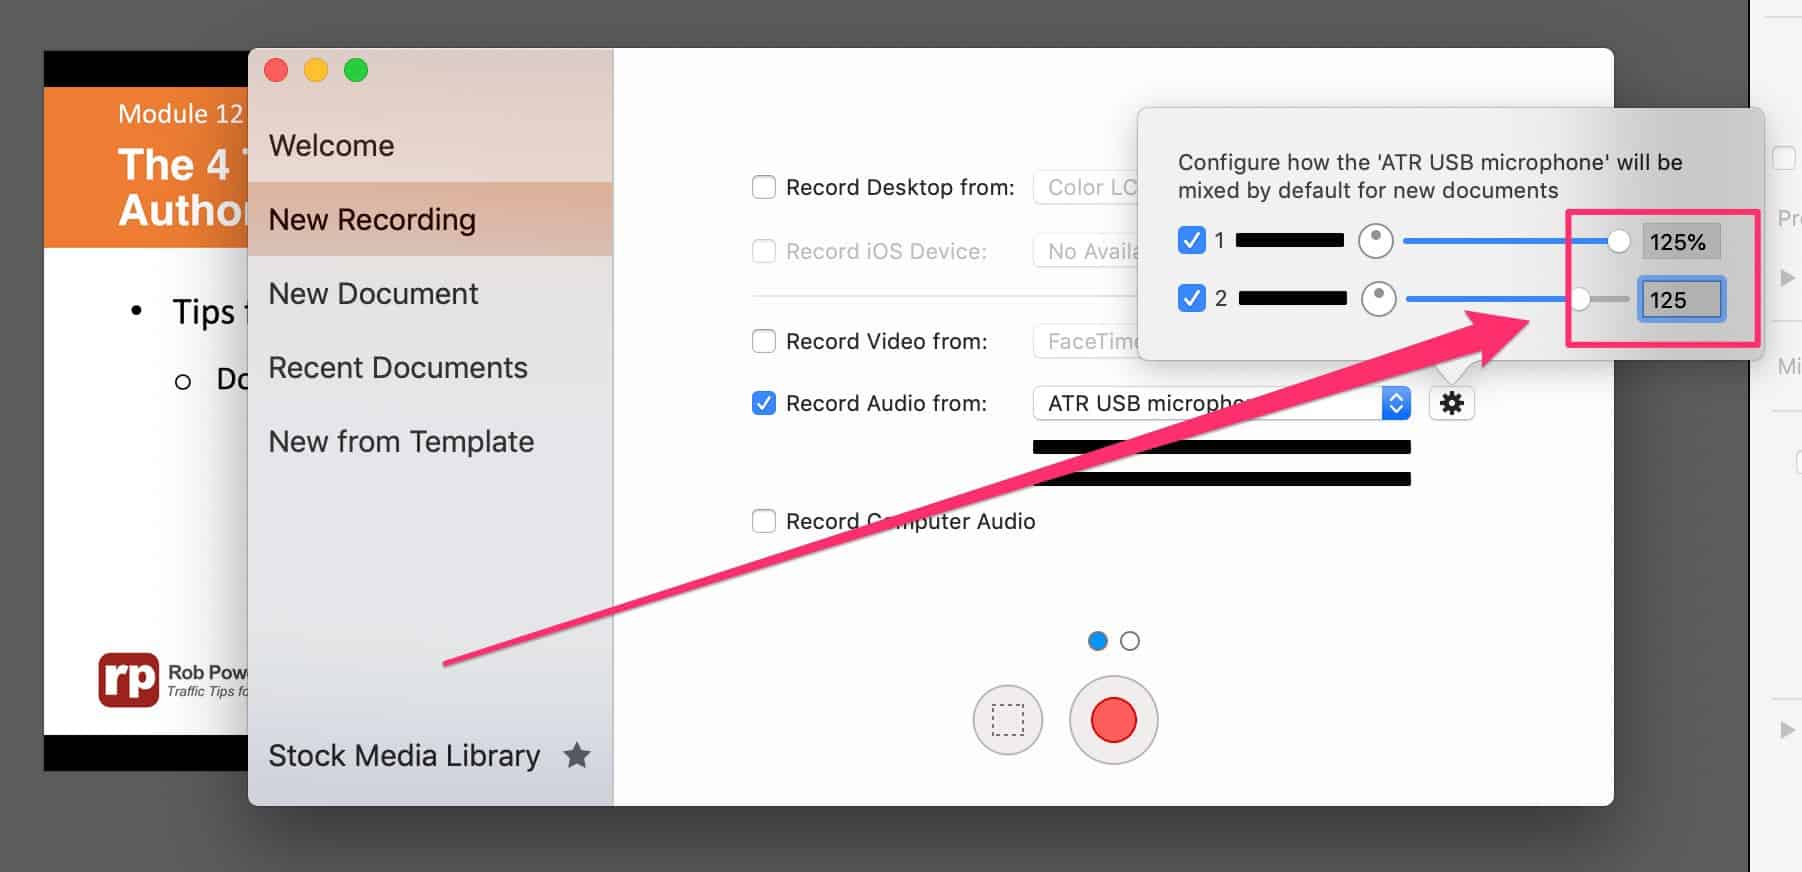
As soon as I add the audio to the Screenflow Timeline, I place the scrubber head on the audio clip and set the volume to 50%.
I then check the box that says ‘Smooth Volume Levels’:
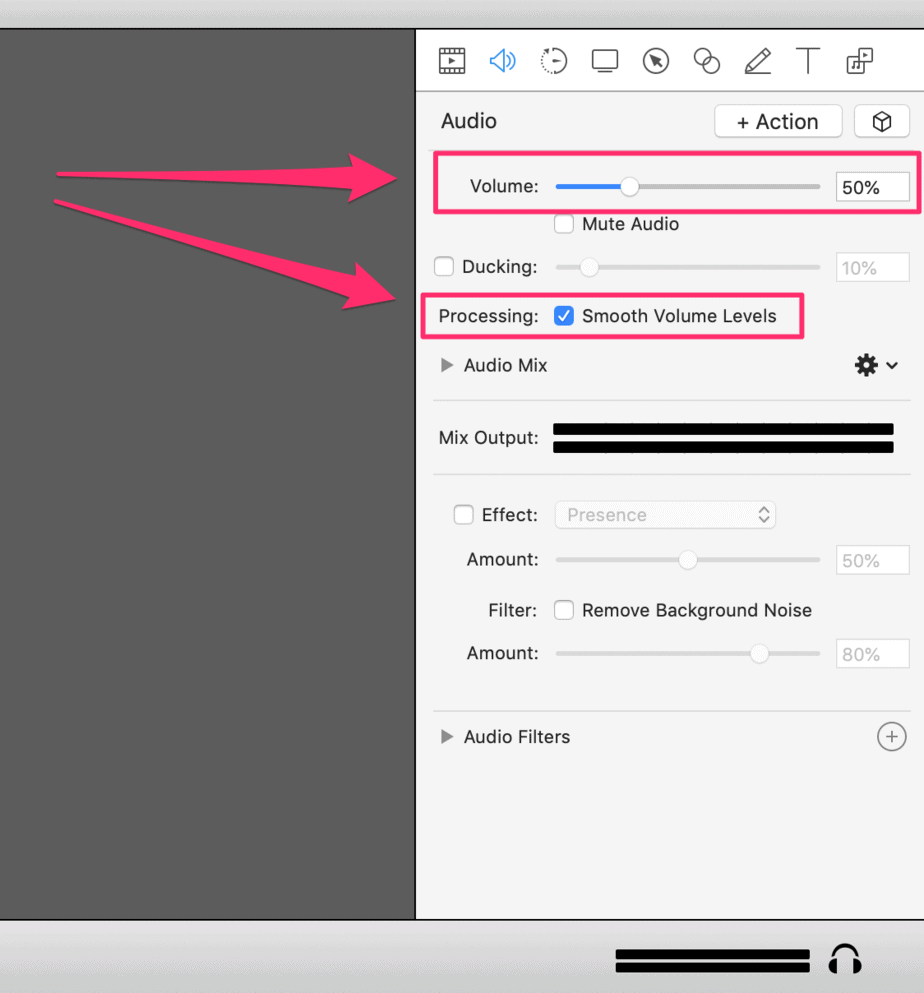
These settings may or may not work for you.But whatever settings you end up using, apply the same settings to each lesson.
That way, your listeners won’t have to adjust their headset volume with each new lesson.
Conclusion
Turning your knowledge and expertise into an online course is a great way to monetize your blog.
But creating your first online video course will likely be a steep learning curve.
I hope these tips will make that curve a little less steep for you.